Studying Spline Components In Unreal Engine 4

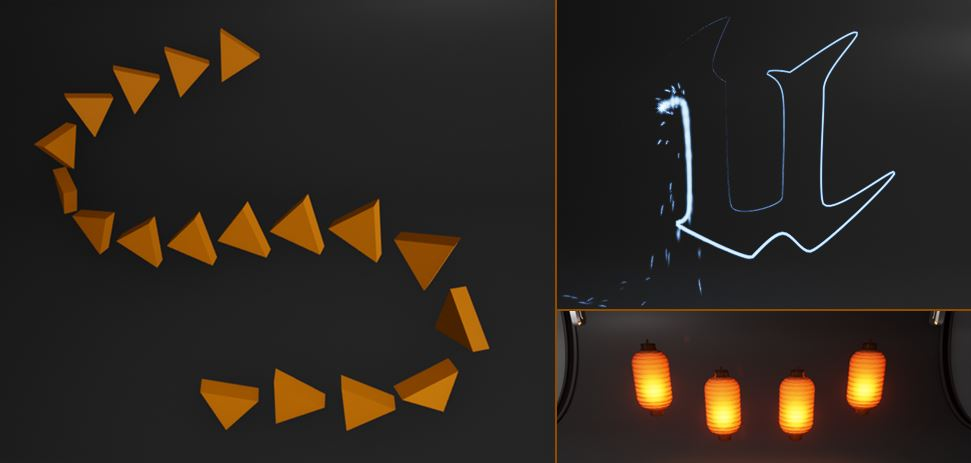
So I was working on a puzzle for Ionia where I wanted to draw the player’s attention to the other side of the room where a door would only be unlocked if they pressed 3 seperate buttons. I thought we could use an effective visual cue like Portal but aesthetically match Ionia’s environment.
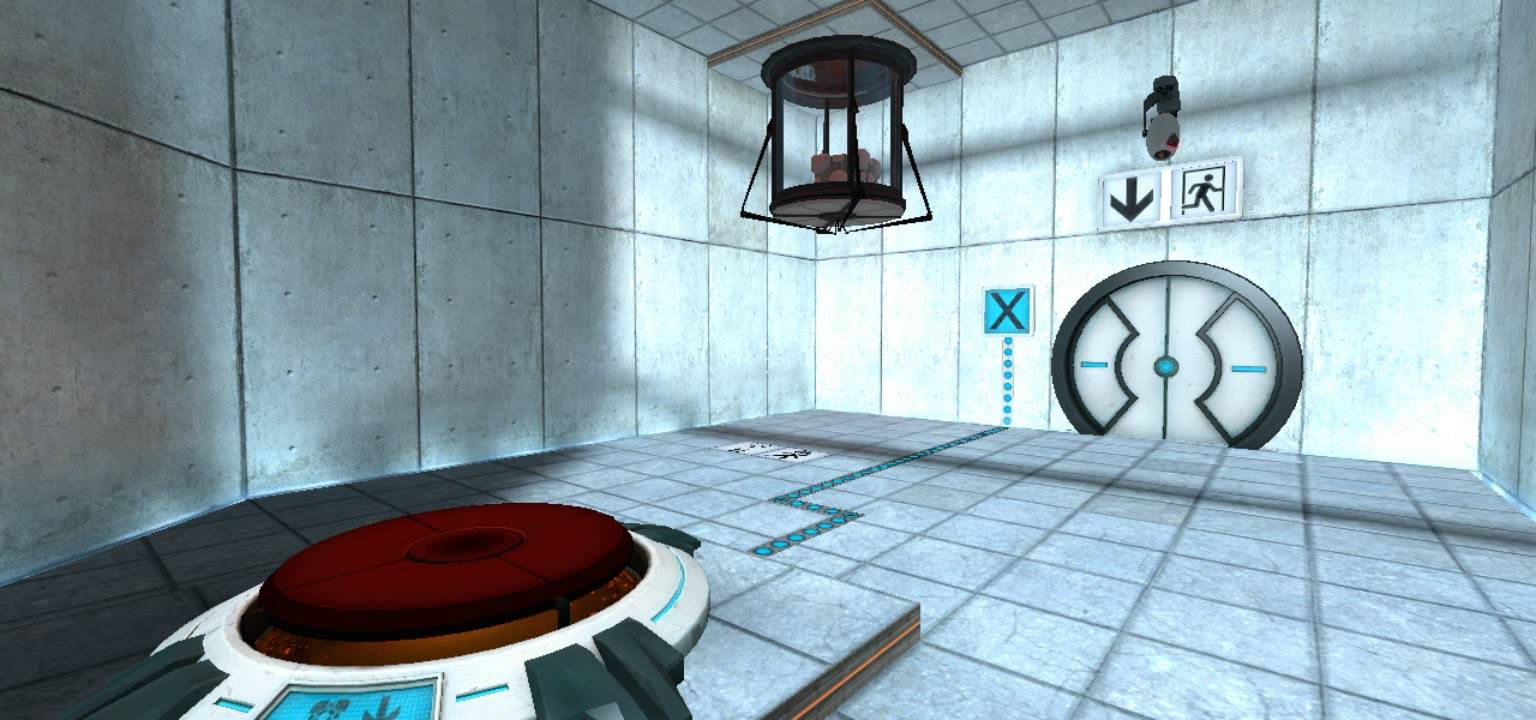
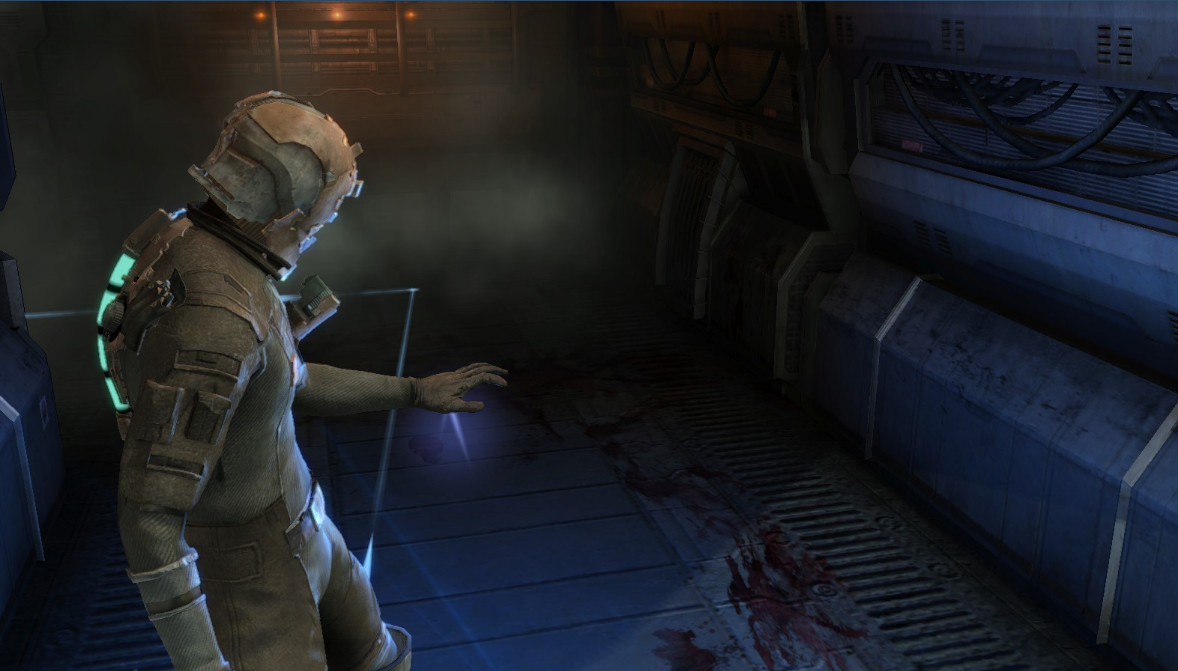
That's when I fondly remembered the "breadcrumbs" mechanic from the Dead Space series.
The UE4 content examples for splines had a very similar particle effect, and working with splines sounded very exciting. At Blue Void Studios we want to keep players immersed and are aiming to make a game without control-snatching cutscenes.
What is a spline?
A spline is at least two vector points in 3D space connected by a line.
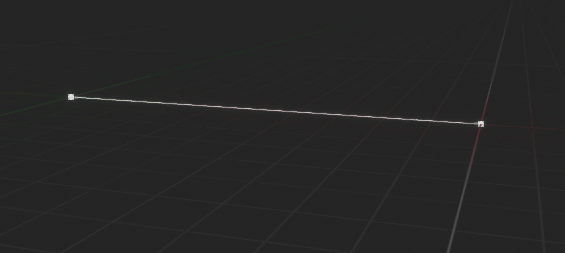
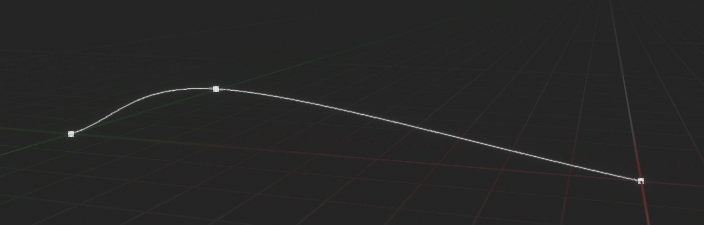
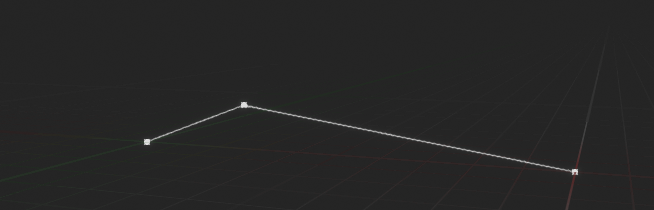
The shape of the spline can be controlled by adding more points and choosing different point types:
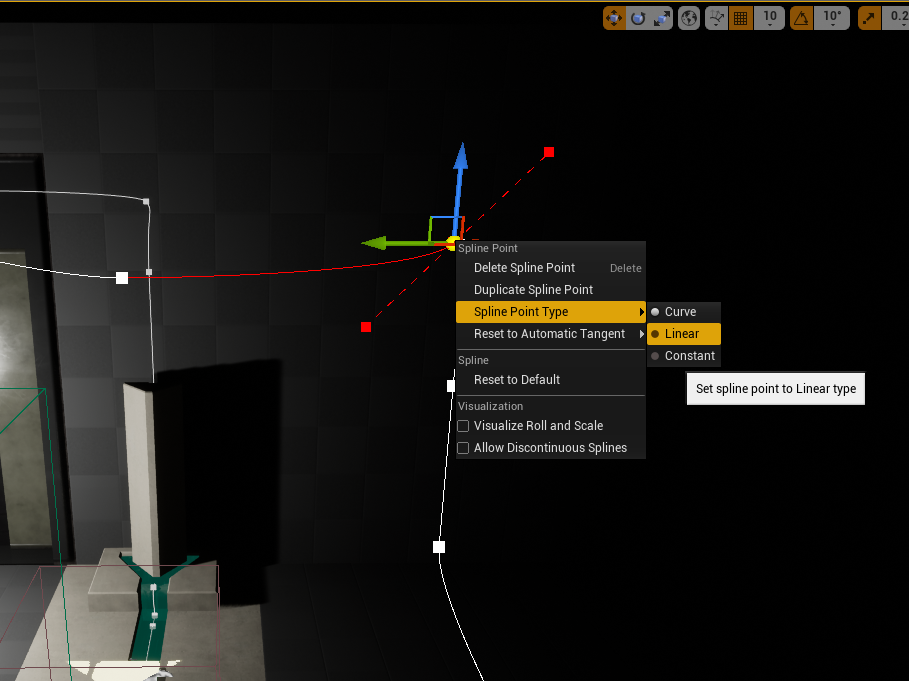
Curve
Linear
Why spline components?
- Fun and efficient to work with
- Pretty intuitive controls if you've used splines before in other 3D tools or used the pen tool in Adobe Photoshop and Illustrator
- Creates smooth paths and curves or linear paths for meshes, game objects, or particles to follow
- Perfect for level building blueprints that will be used multiple times throughout development, such as fences, staircases or race track/road tools.
Dissecting examples

While trying to grasp how to use splines in UE4, I searched for some resources around the web and dissected Epic's UE4 content examples.
Two important Blueprint nodes
After dissecting spline blueprints in the content examples, it became clear that two blueprint nodes were very important to making most effects and tools:
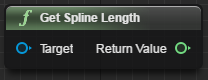
- Get Spline Length - This node will get the target spline's length in Unreal units from beginning point to end point.
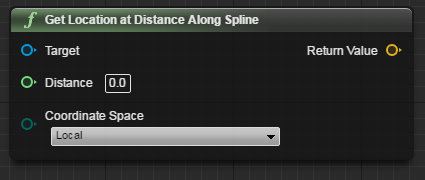
- Get Location at Distance Along Spline - This node will use a spline asset you assign. It will take the amount of length along your spline (float value) and produce a Vector 3D value. The output will be either a set of local coordinates or coordinates in the world (depending on which choice you make in the drop down menu).
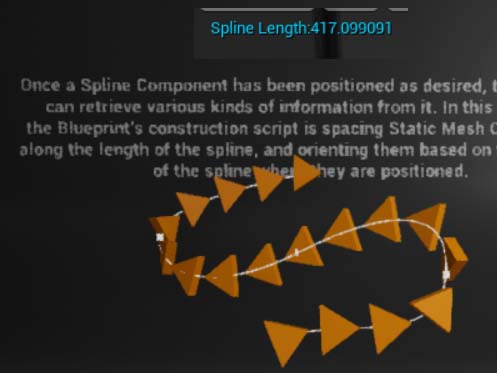
Example 1.2 - Placing components along splines
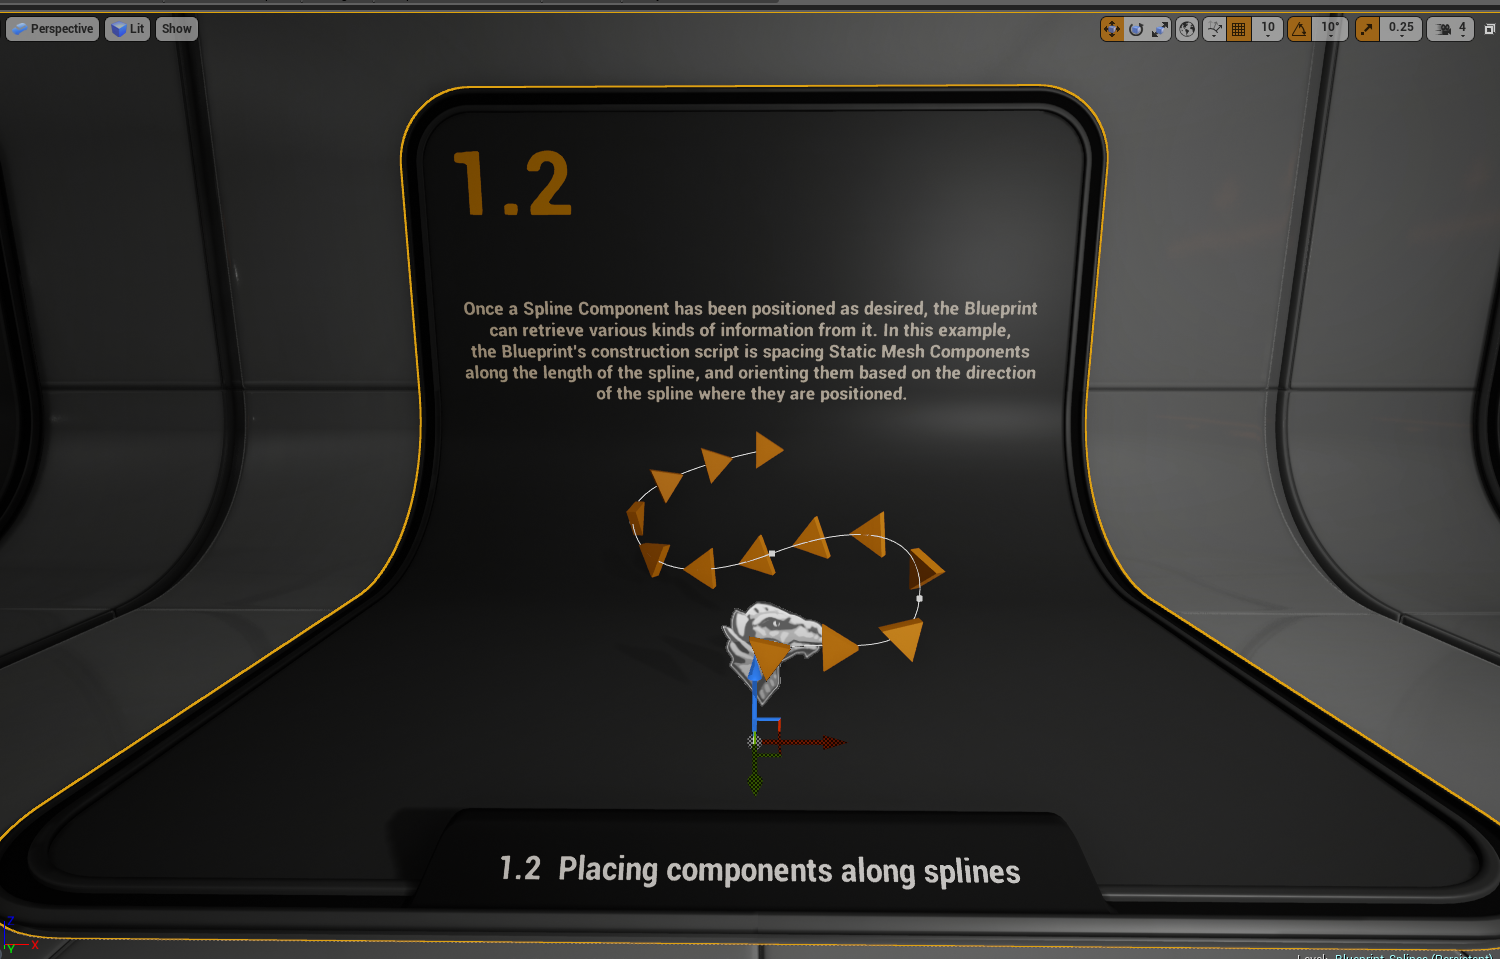
When you get the location along the spline, you can measure out a section to evenly distribute points for objects to spawn along. You will need to measure the total length of the spline and then divide the length by the number of objects you want to spawn.
For example, if your spline was about 417~ Unreal units long and you wanted to spawn 13 pointy arrow meshes along the spline, you would divide 417 / 13.
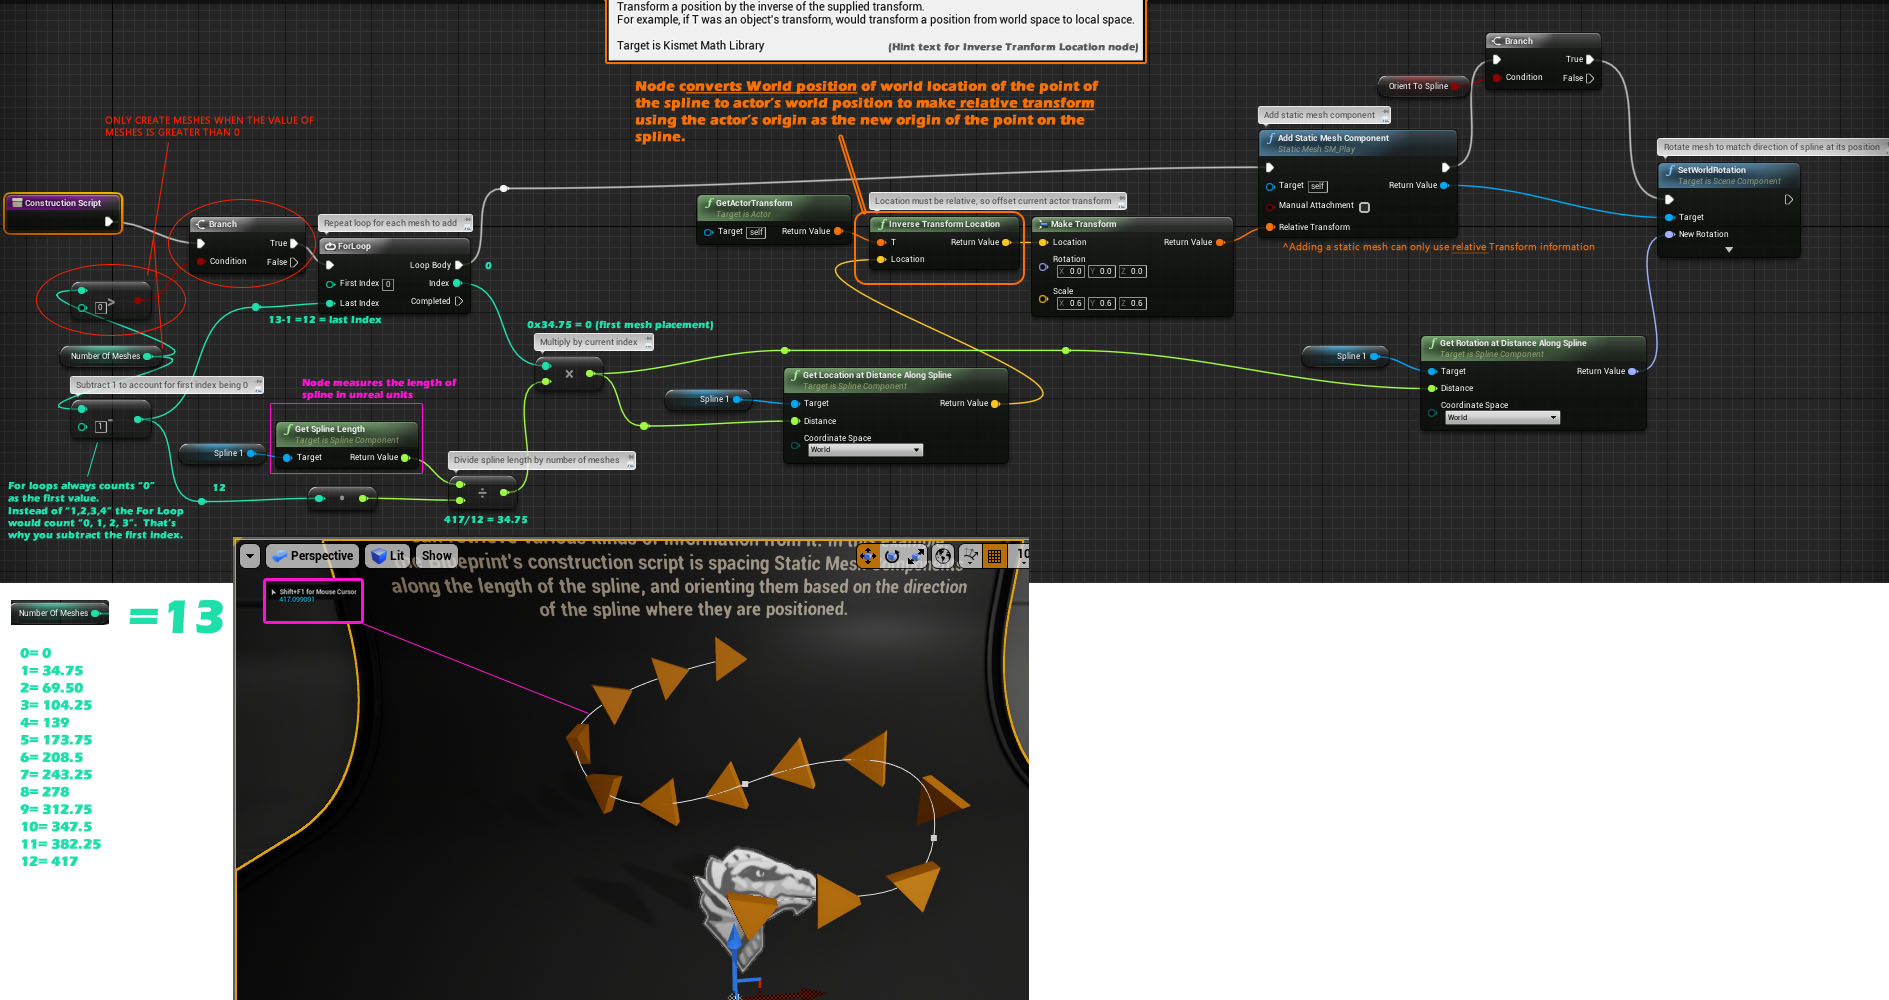
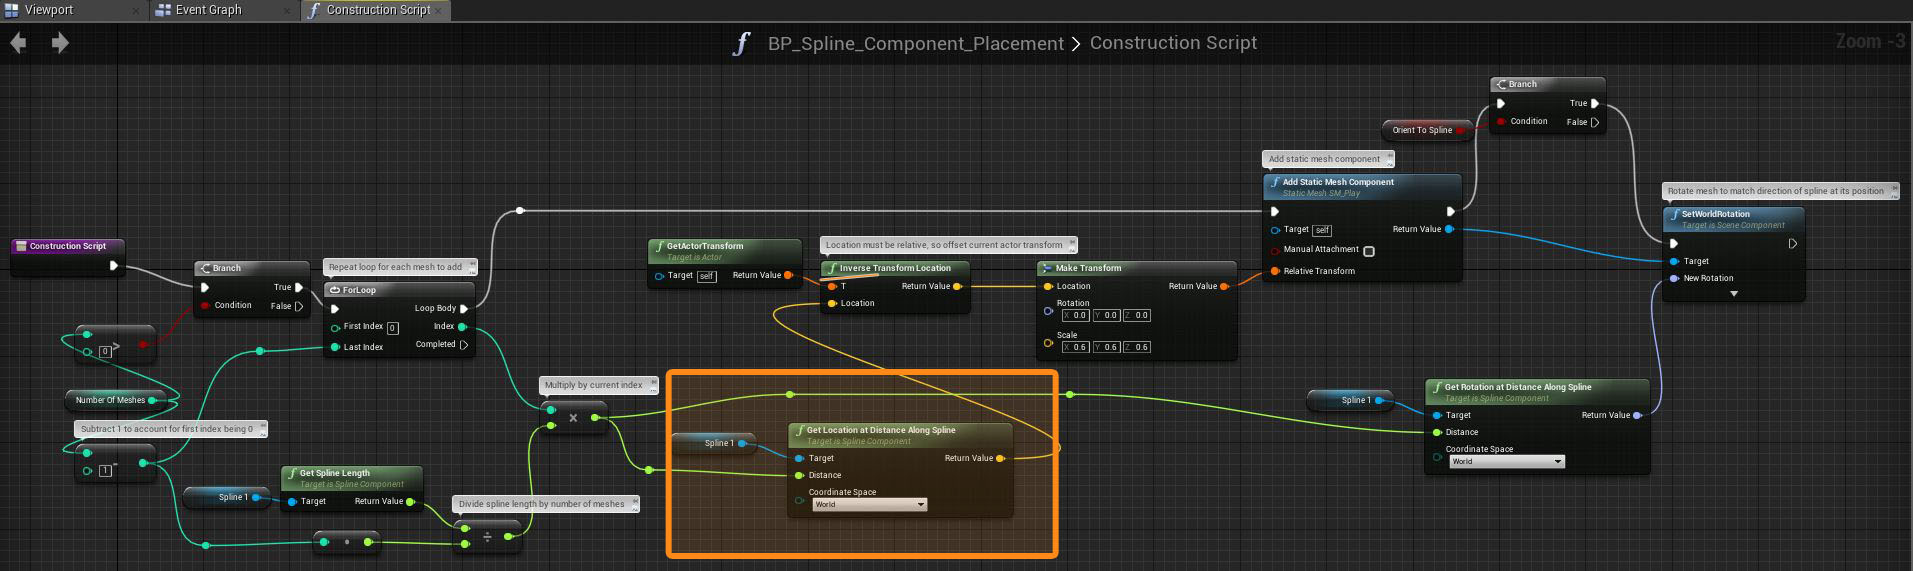
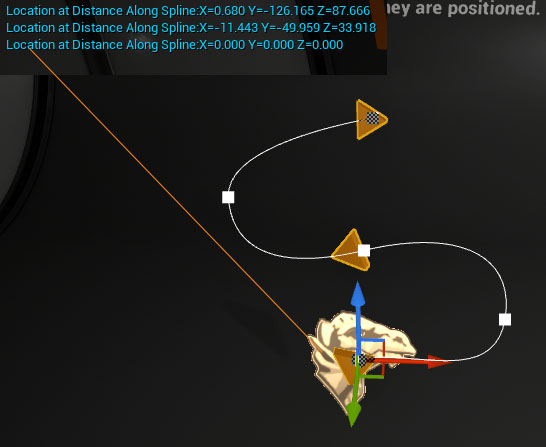
When setting the location of the next object spawning with the results of your math loop, you can simply set Get Location at Distance Along Spline to Local instead of World. This way your numbers will work out using the actor's coordinates instead of the world's. The Get Actor Transform and Inverse Transform Location (from what I can deduce) is a legacy work around from previous versions that did not have the drop-down option to switch to Local for the Get Location at Distance Along Spline node.

Here's an example of World space vs. Local space. Local space is the distance of the actor's mesh or object from the origin of the actor (local origin = sphere in the Blueprint's viewport). World space is the distance of the object from the level's origin, aka the 0, 0, 0 coordinates on the map.
Example 1.3 - Using a spline as a path
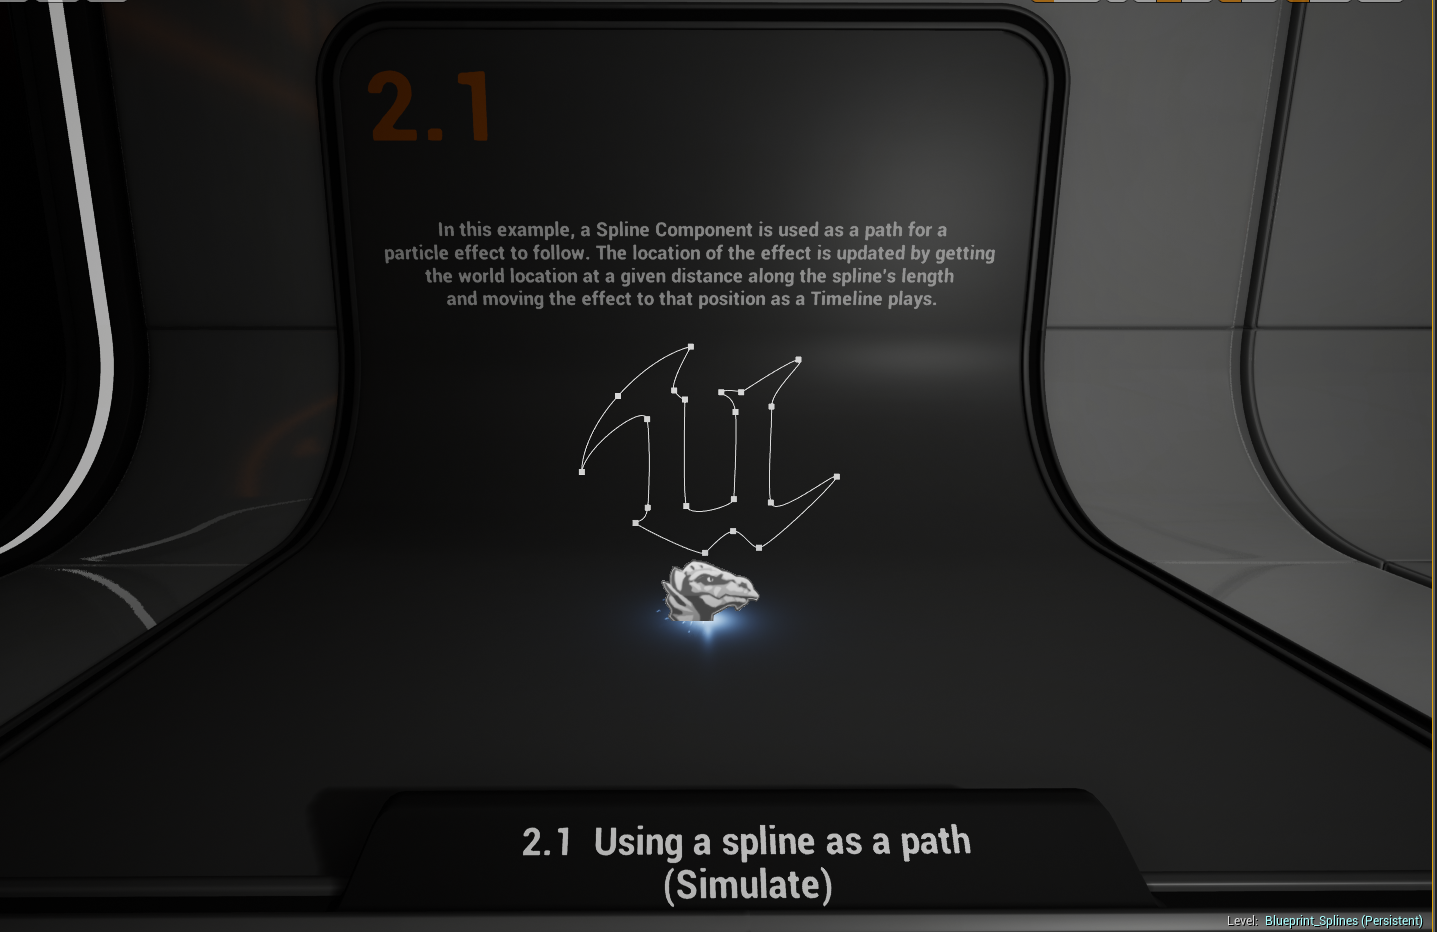
This blueprint will take a ribbon emitter particle and update its location based on the spline's length and points along it within 3D space.
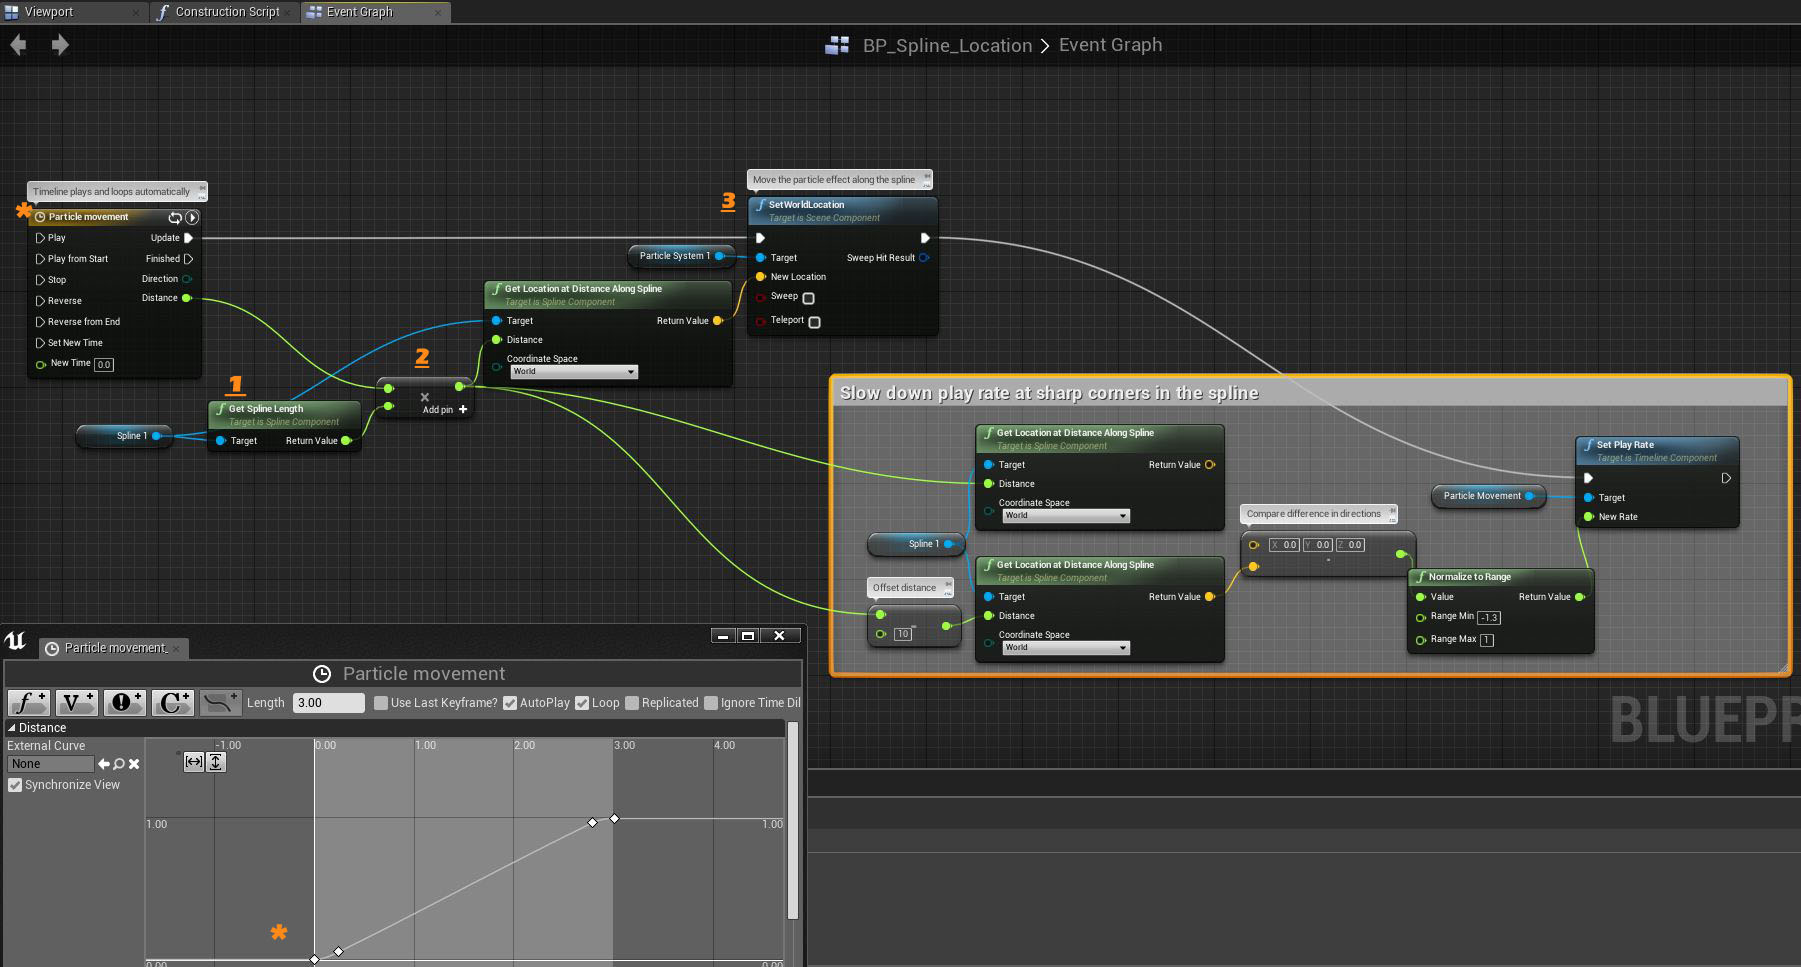
The particle effect animates using a looping Timeline with a linear interpolation - a "lerp" - from 0-1. Get the length of your spline, then multiply it by the interpolating values of your timeline. Use the location data of the result to plot in 3D space the location your ribbon emitter.
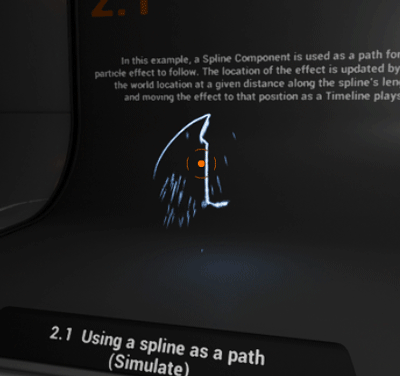
As the timeline plays, the location of the point along the spline will update, and so will the location of the particle ribbon emitter.
Resources from around the web
- Blueprint Spline Content Examples
- Blueprint Spline Component Property Reference
- Blueprint Spline Mesh Component Property Reference
- Zak Parish's training stream on how to use spline components to make a road asset.