A Lighting and Post Processing Study in Unreal Engine 4

After the Unreal Engine 4 live stream where Epic showed off some videos from Koola, a UE4 developer on the official forums, I was very interested in creating a scene with that amount of visual prowess. See the original forum discussion here.
Here is a video of the final product of my research:
https://www.youtube.com/watch?v=UzfezyBbrGQ
Basic Lighting
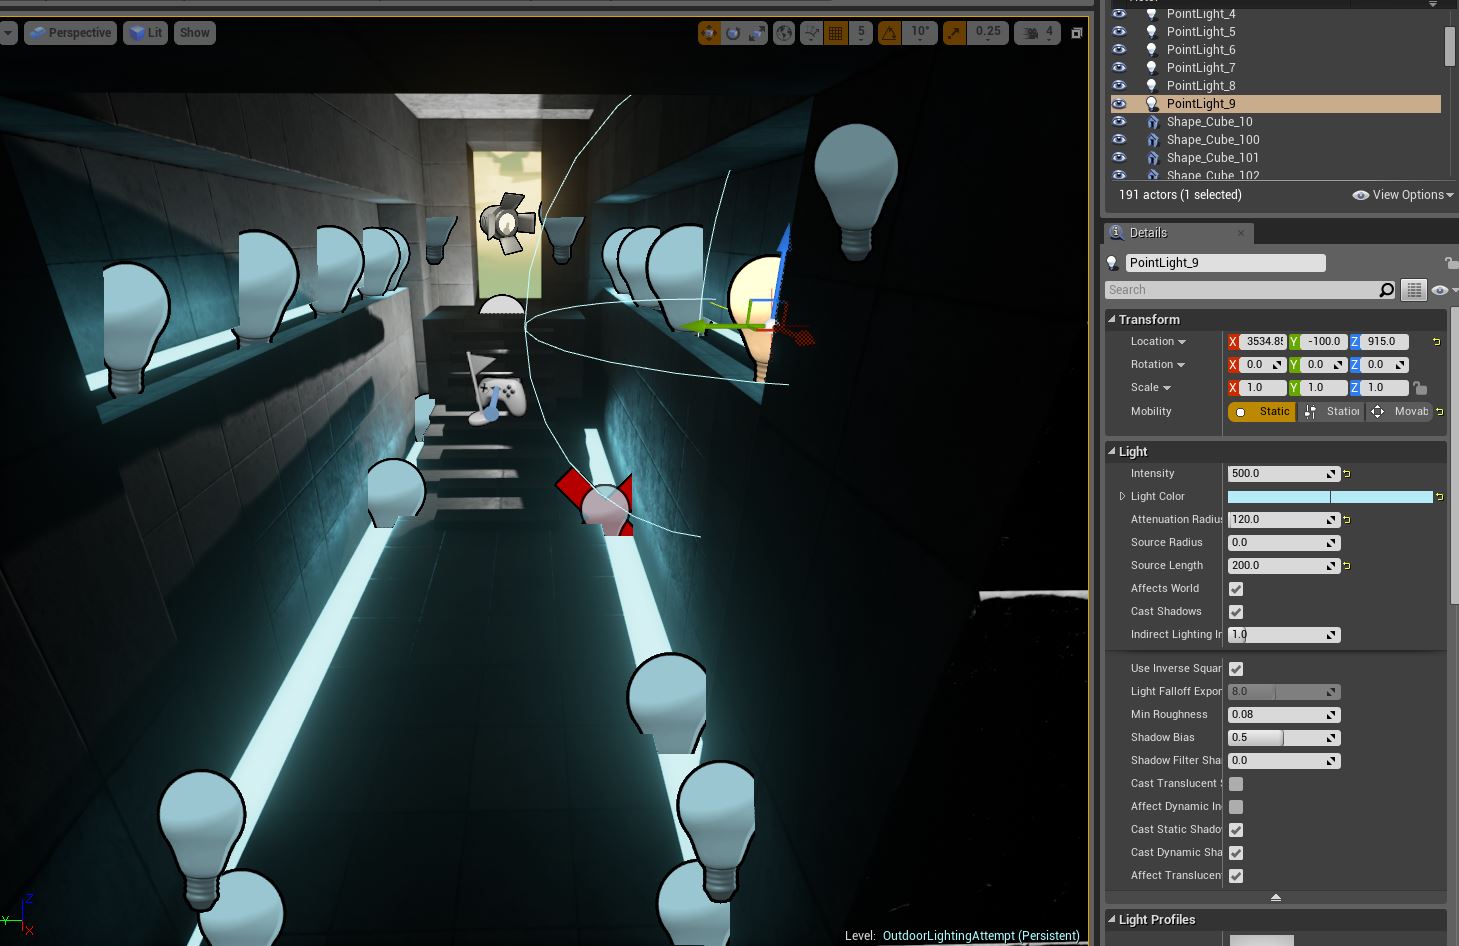
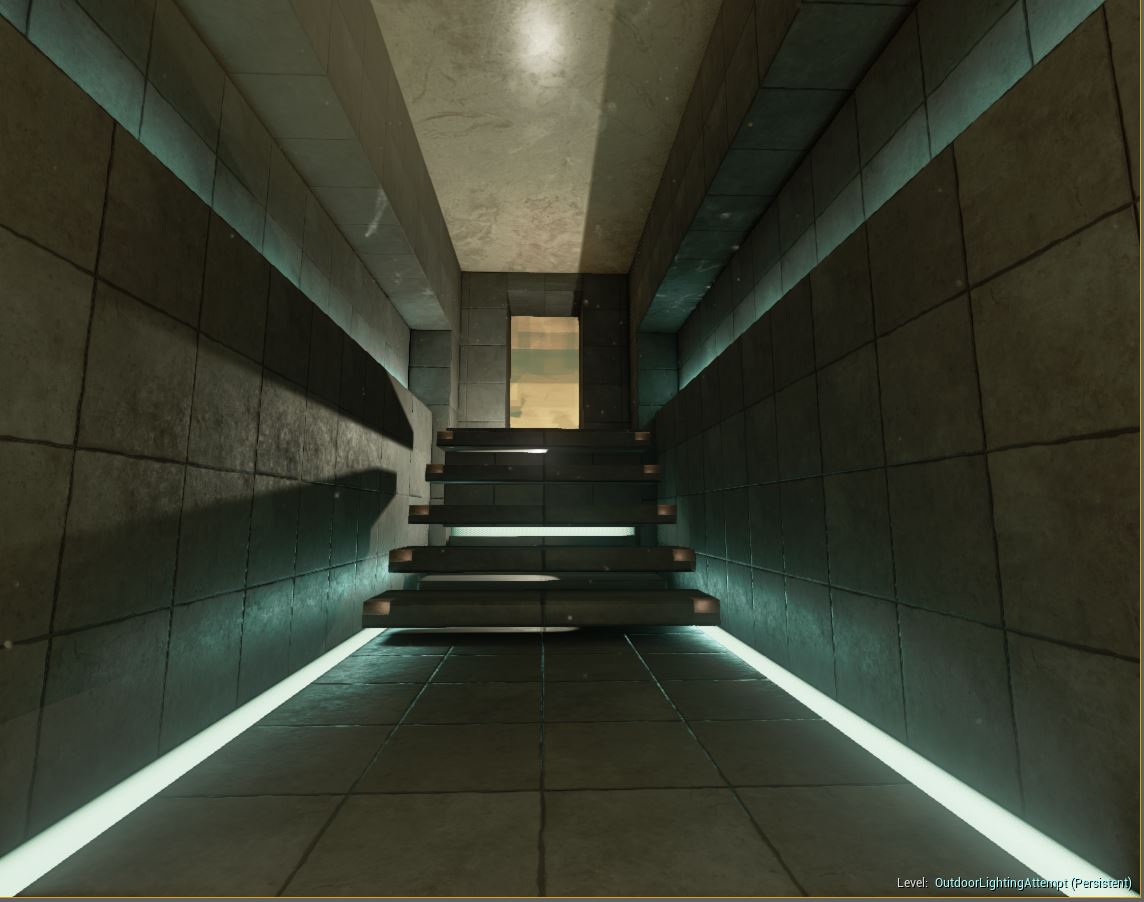
I started with the basics I had already known: Point Lights in strategic locations to simulate the bounce lighting I desire, a Dominant Directional Light outside with a Spotlight shining in to amplify and emulate the effect of sunlight, and also 2 Dynamic Lights near the bottom with a radius length that stretches along the glowing floor gutters. (I kind of miss the function in UDK were you could create lighting using emissive materials applied to meshes.)
Reflection Spheres and Cubes
Next, I added reflection spheres and a reflection cube while trying to follow the guidelines in the UE4 documentation.

Lightmap Resolution
The shadows on the left wall are less jagged after increasing their lightmap resolution from the default 32 x 32 to 256 x 256. (For the sake of taking great looking screenshots or recording flythroughs, changing the lightmap resolution to a greater value is of no consequence. However, in game it will start to affect performance and FPS.
Post Processing
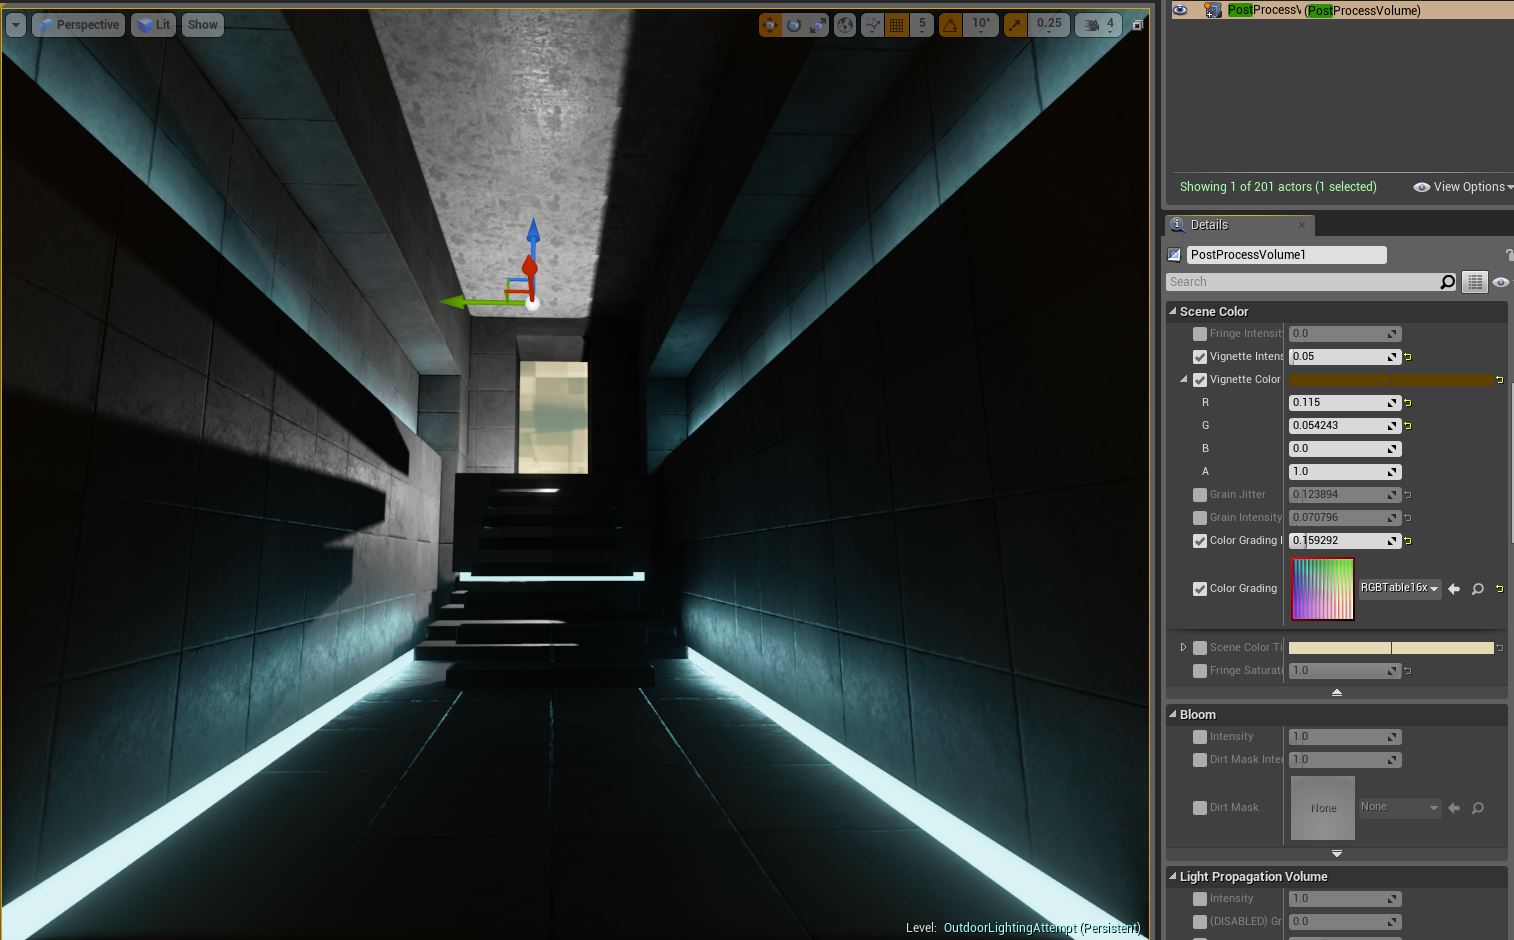
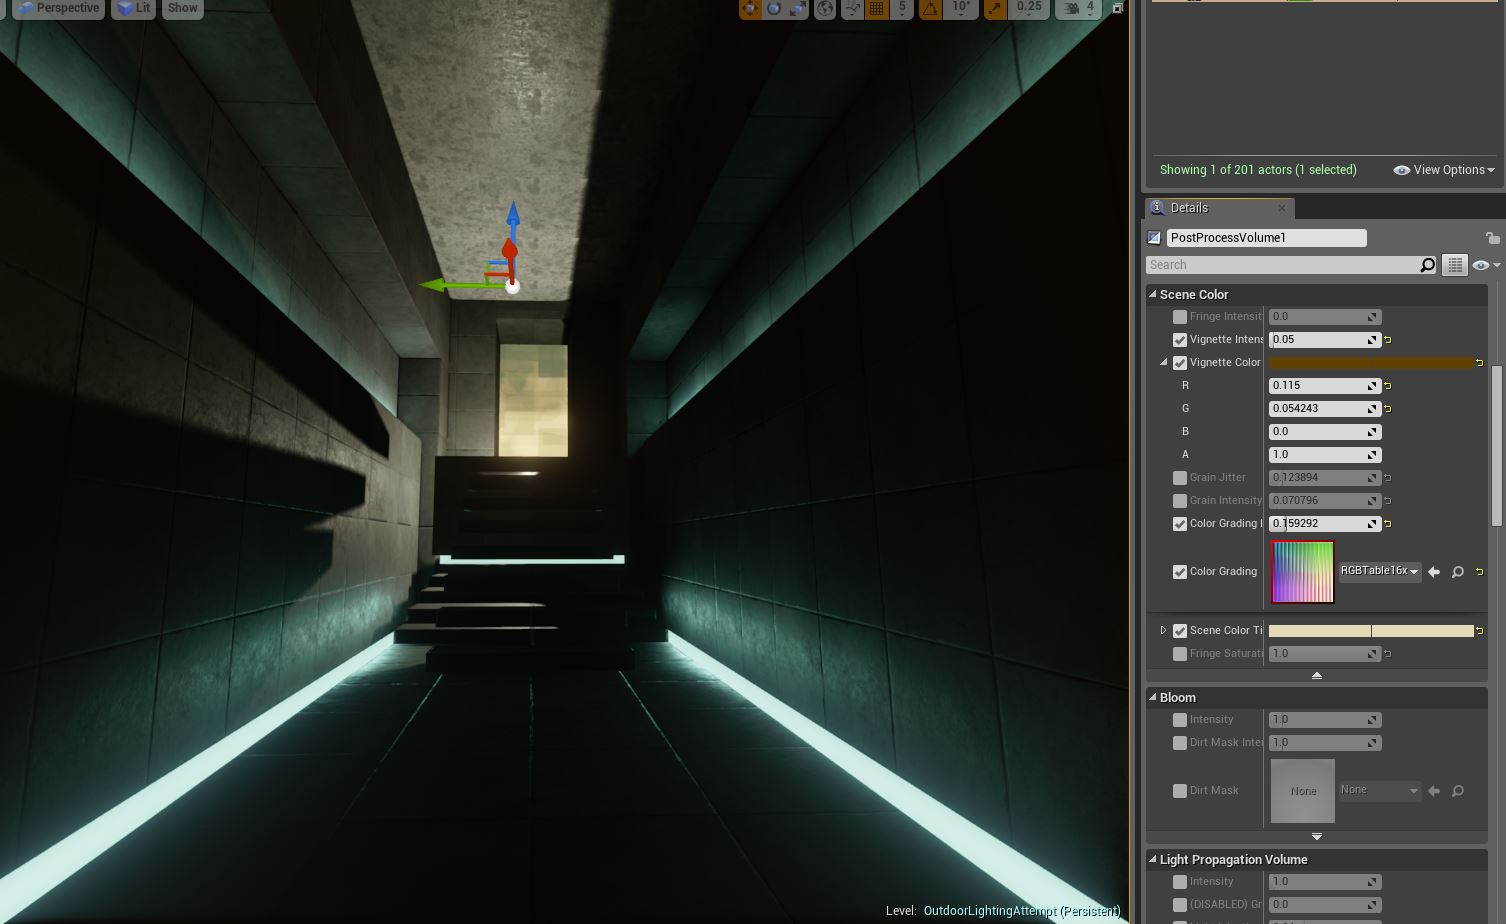
Next, I added some post process effects. In the image below you can see I messed with color grading and added a Scene Color Look-up Table by following the process detailed in the official UE4 documentation.
Subtle Yet Strong
I took a moment to improve the materials of the glowing gutter from being a solid emissive shader to having some darker edges. This is a pretty subtle detail but I think this is just another example of how a good material and subtle details can improve a scene.
Messing with World Settings
Below is a comparison of the same scene with alterations in certain properties in the World Settings menu.
Indirect Lighting Quality
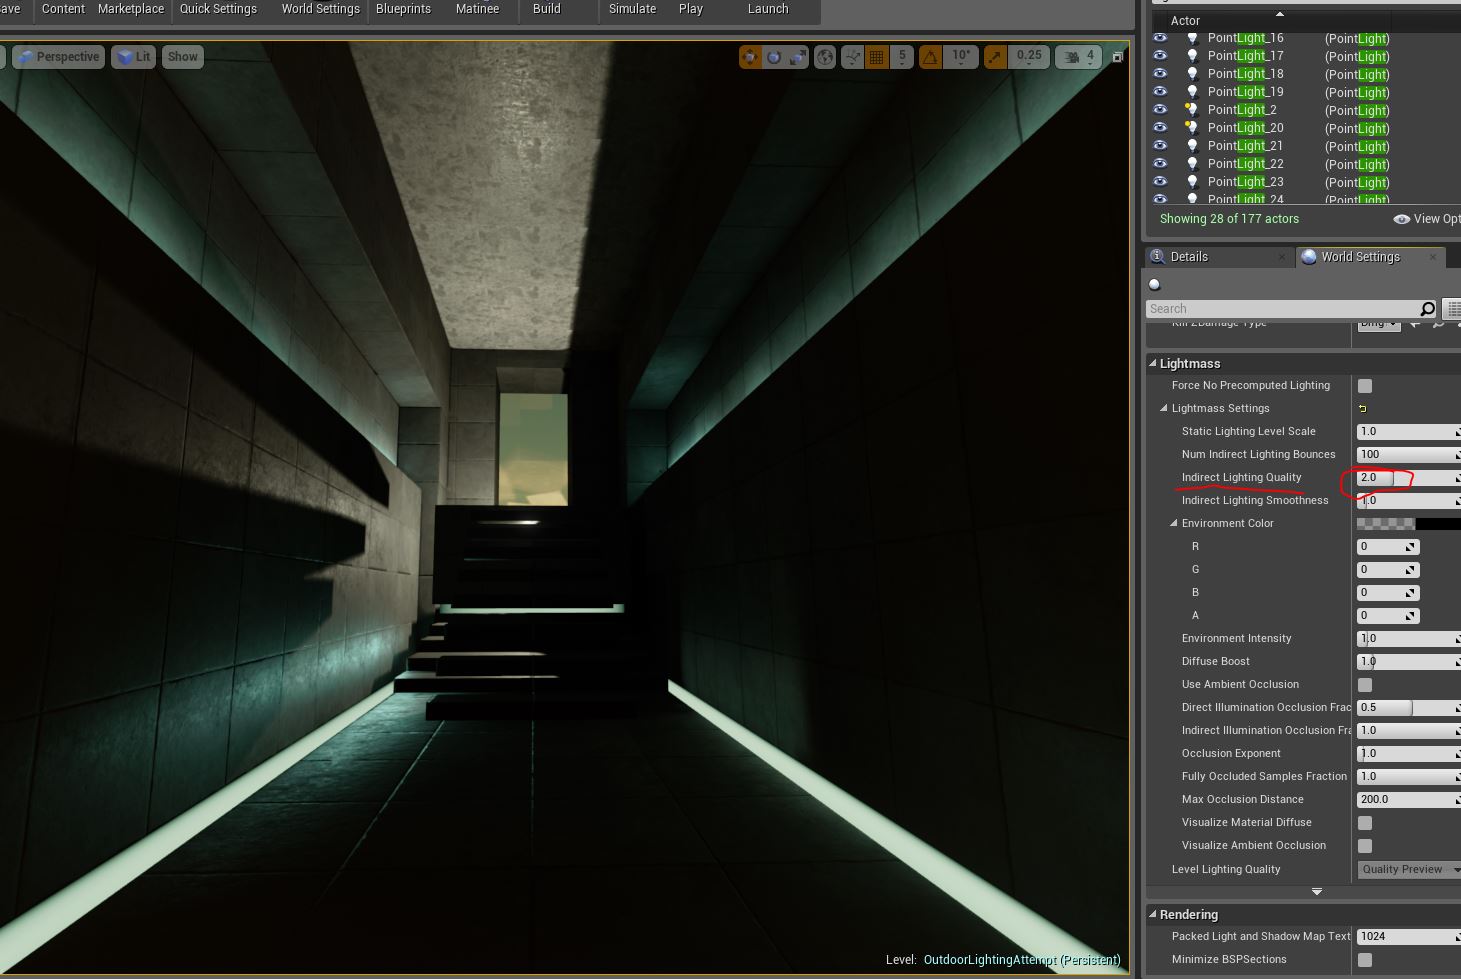
Indirect lighting quality = 2.0
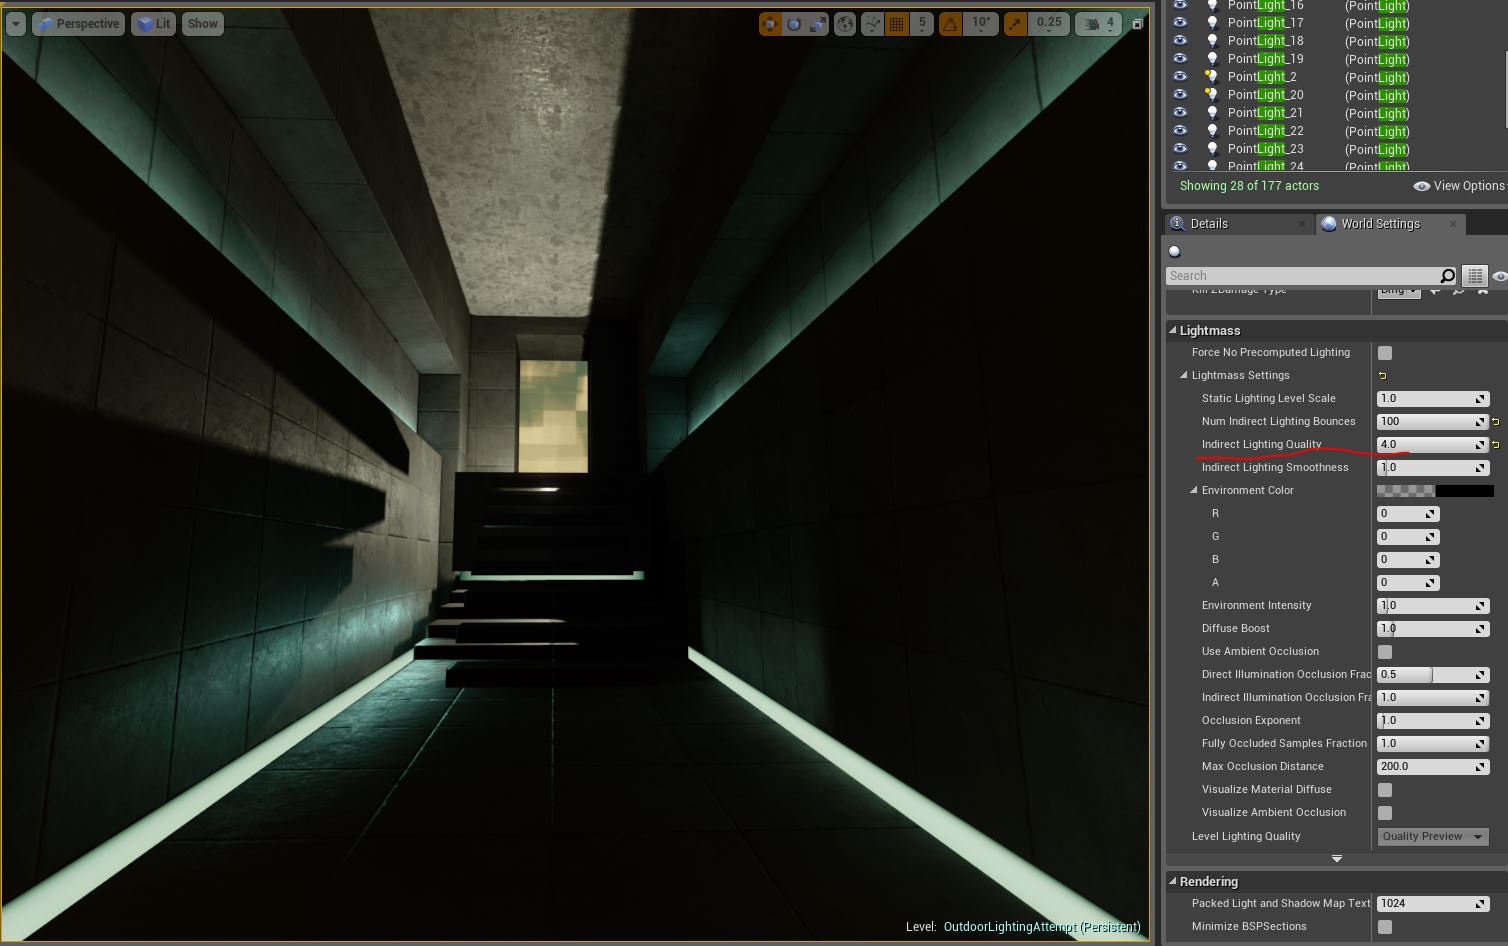
Indirect lighting quality = 4.0
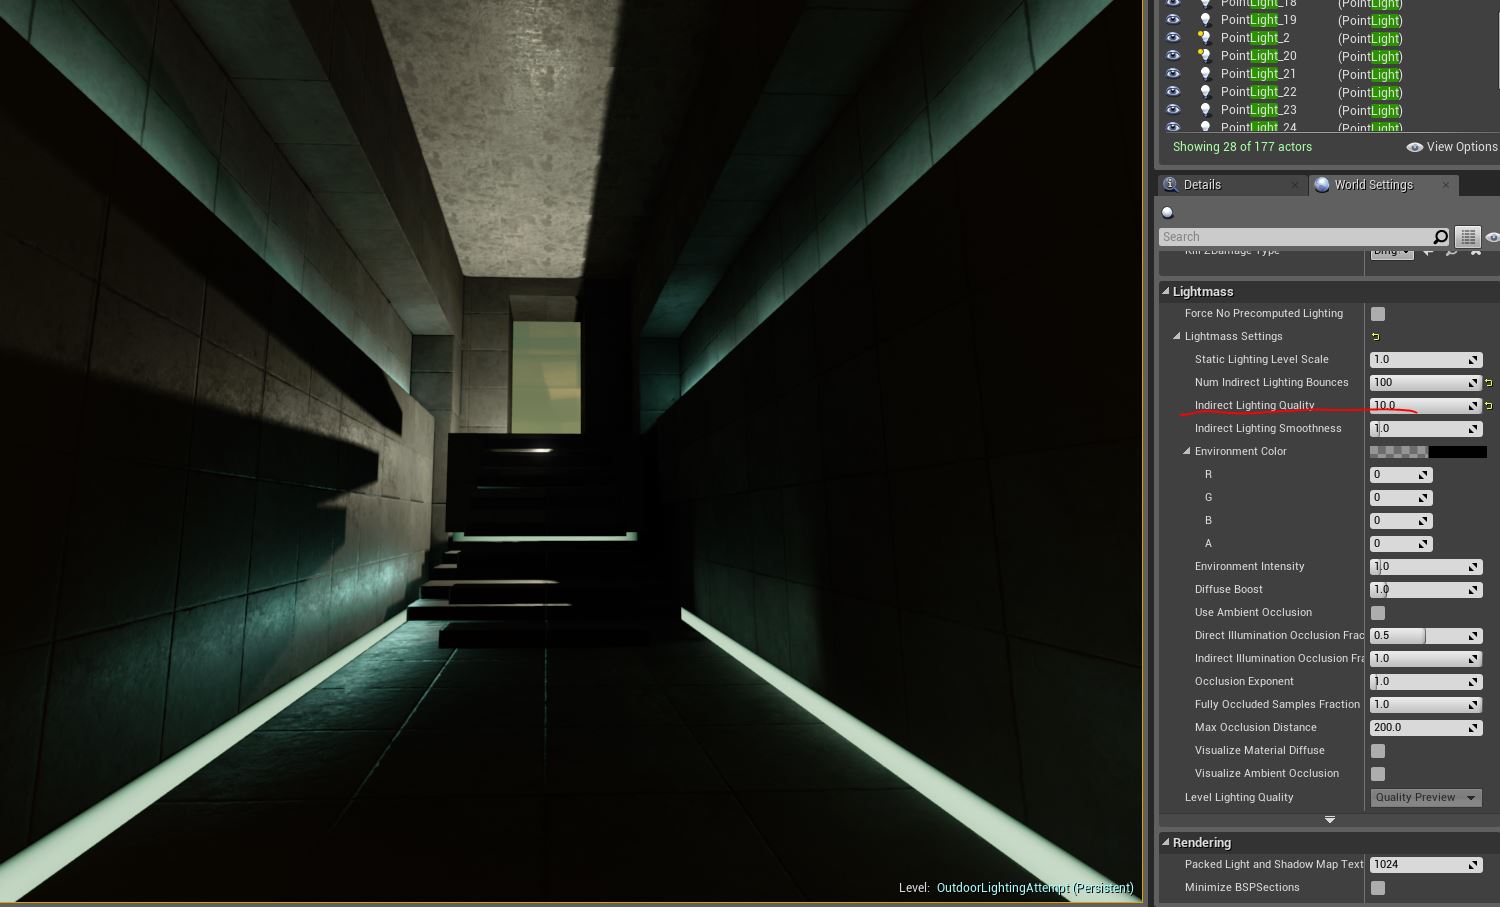
Indirect lighting quality = 10.0
From the documentation:
"Indirect lighting quality scales the sample counts used by the Lightmass GI solver. Higher settings result in fewer solver artifacts (noise, splotchiness) at much increased build times. Note that this will not affect artifacts due to using lightmaps (texture seams, compression artifacts, texel shapes)."
Perhaps these values would be obvious in a brighter scene?
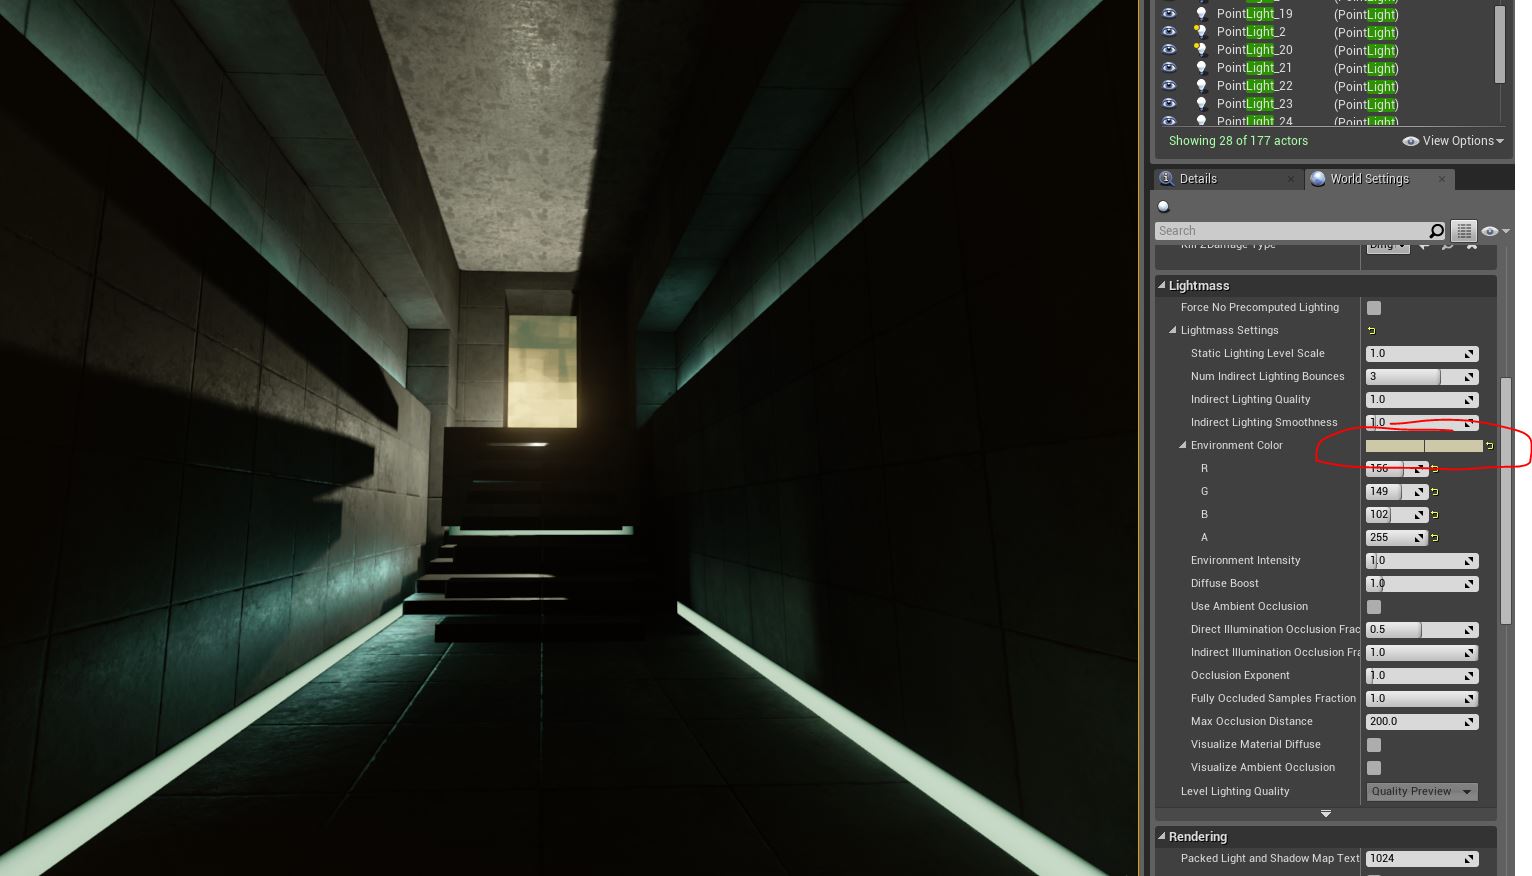
Environmental Color
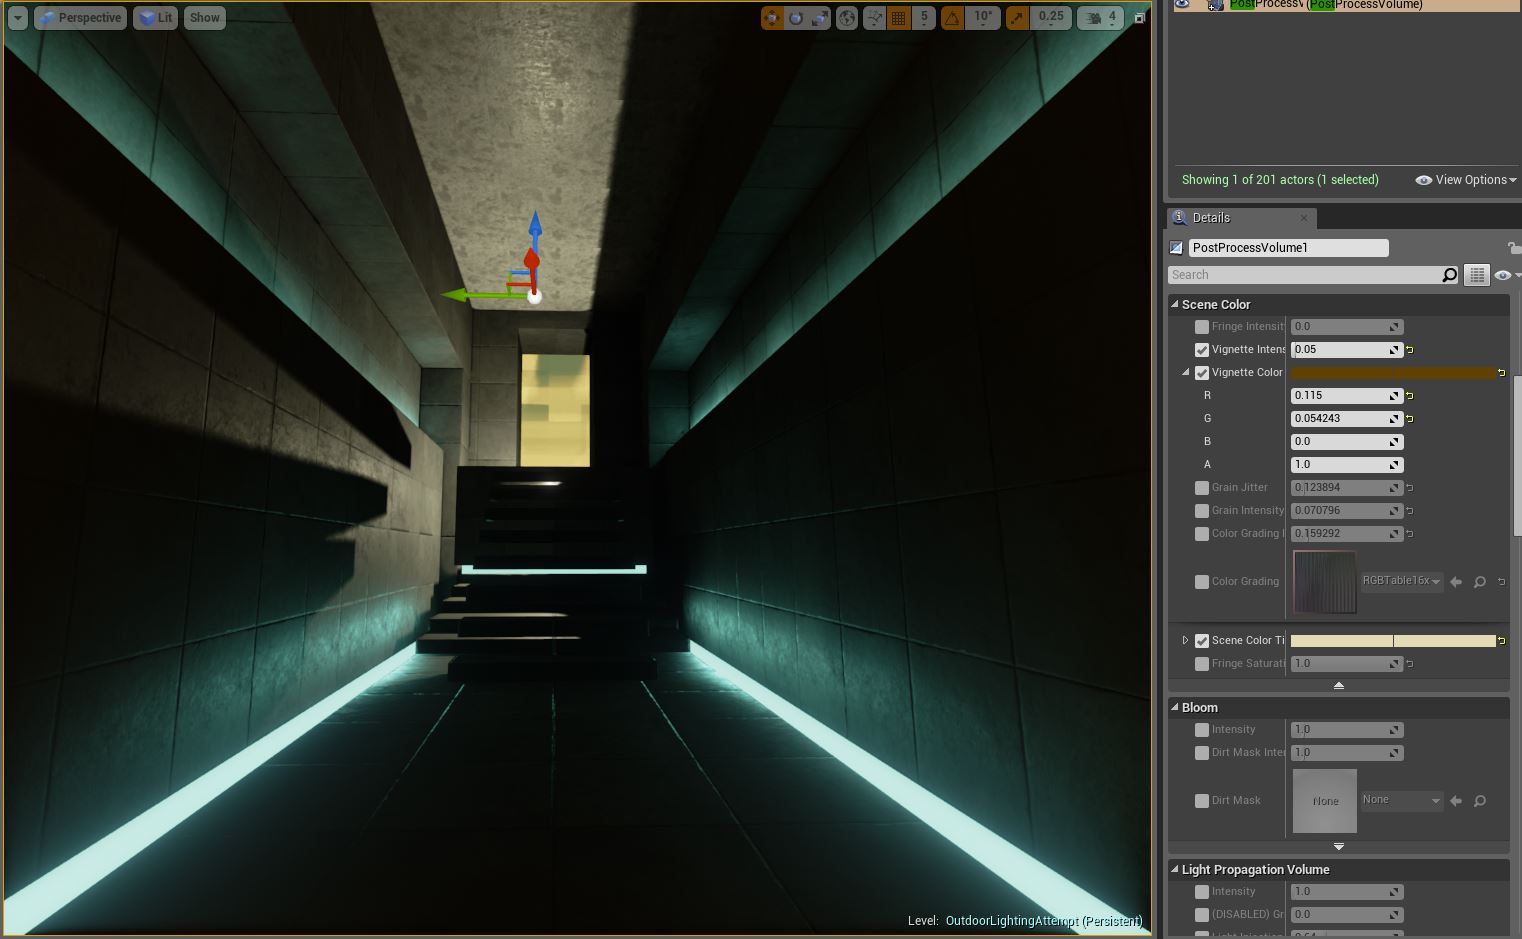
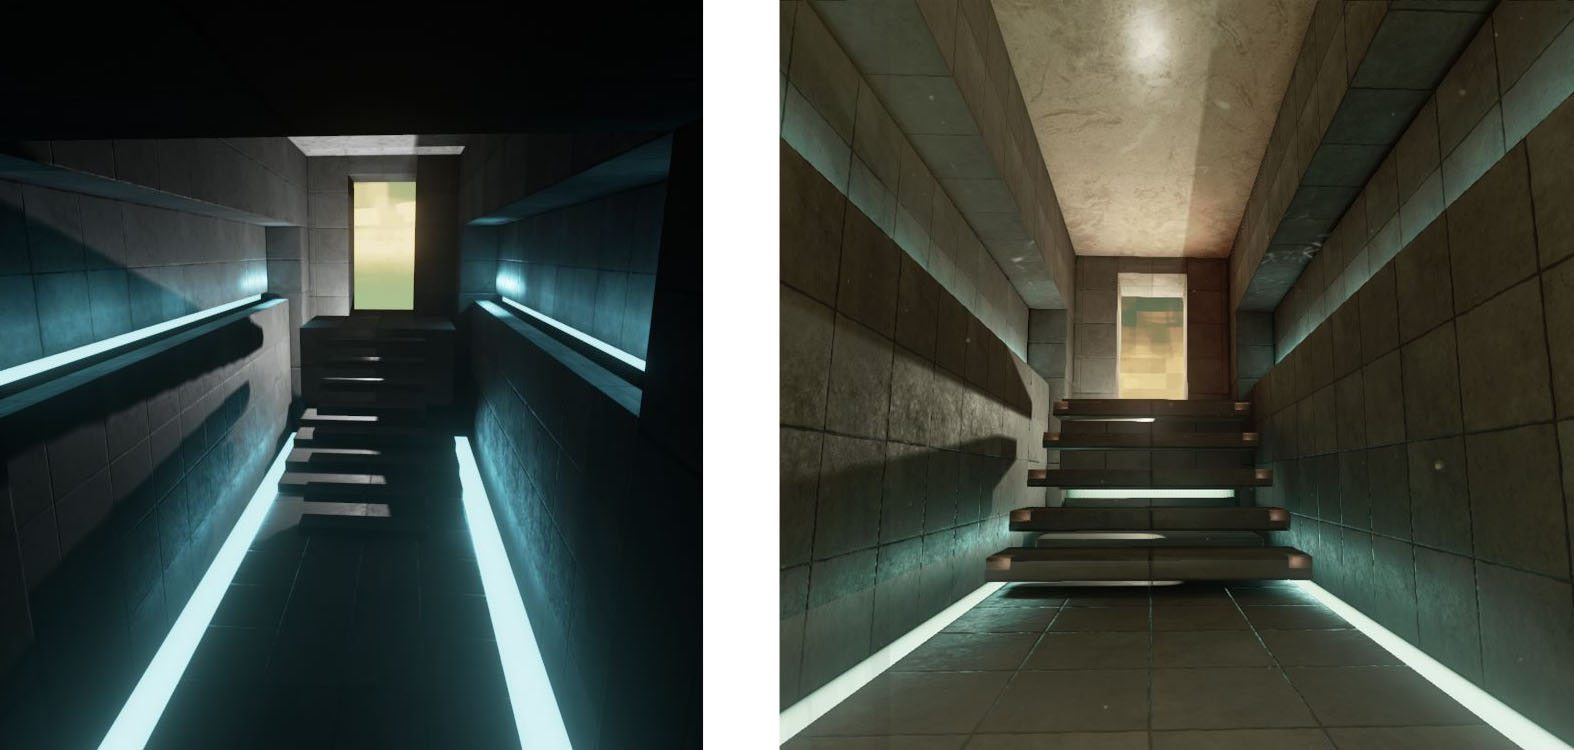
I added environmental color to brighten and warm the scene a bit. A bit subtle but did brighten the scene favorably.
Diffuse Boost
According to Unreal Engine’s documentation, to get the most out of diffuse boost you need to increase the number of indirect lighting bounces:
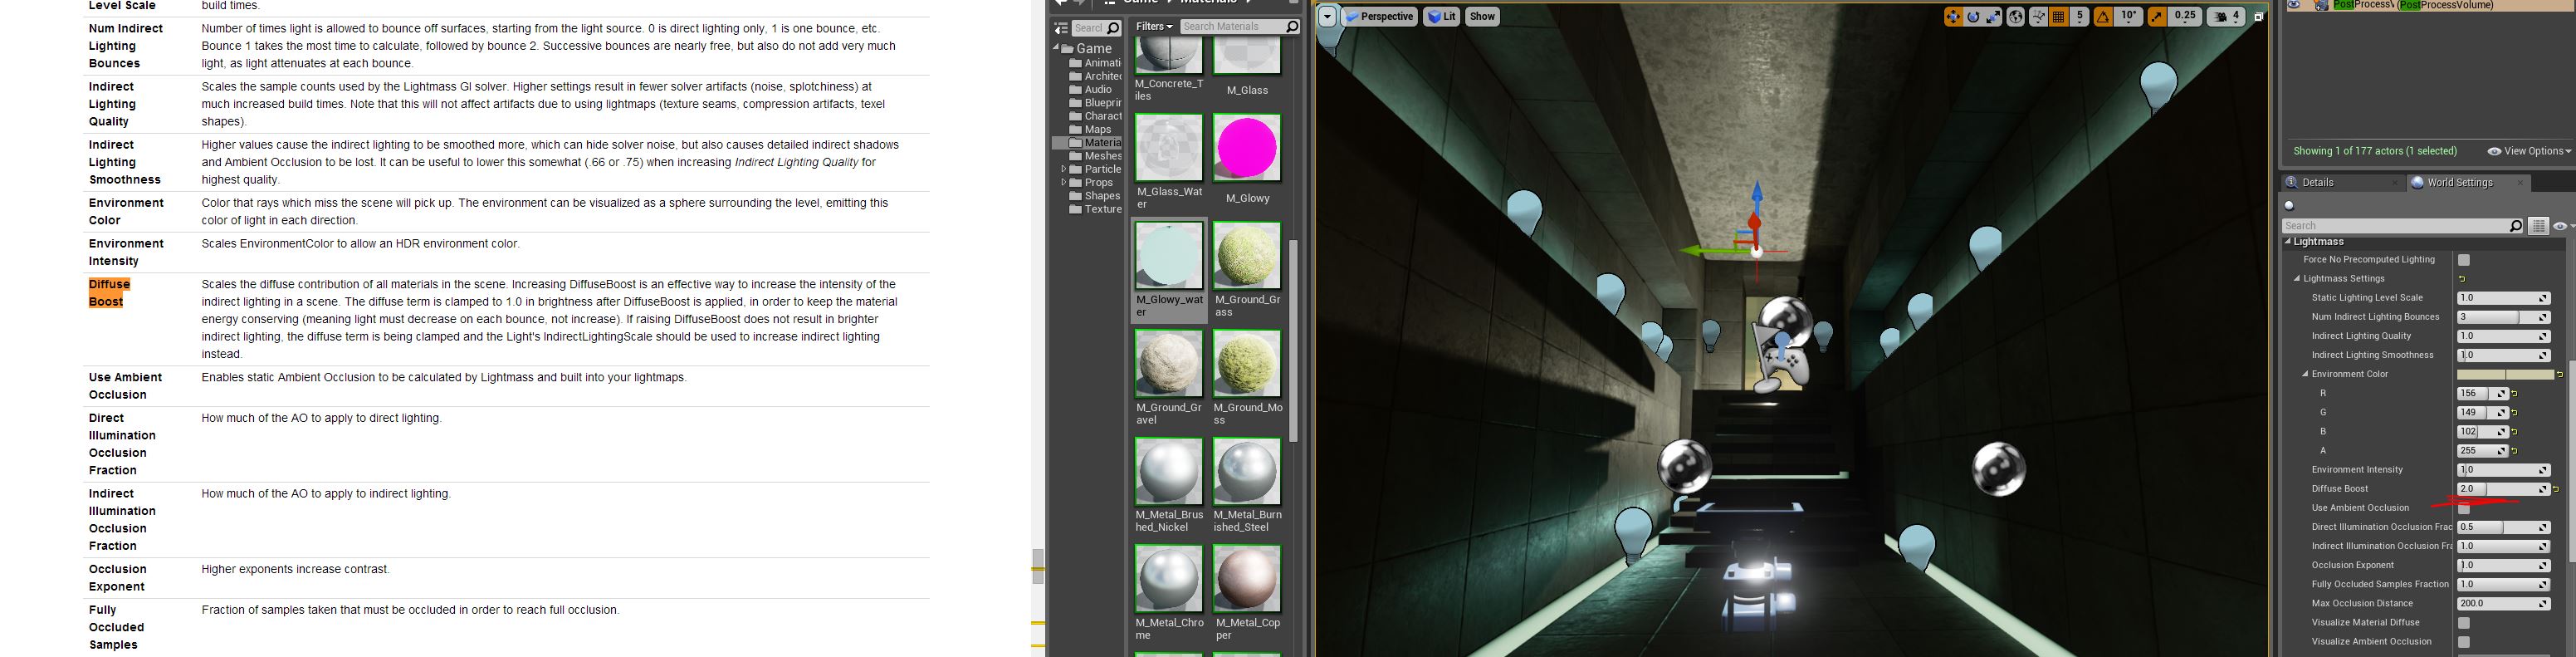
3 bounces, 2.0 diffuse boost
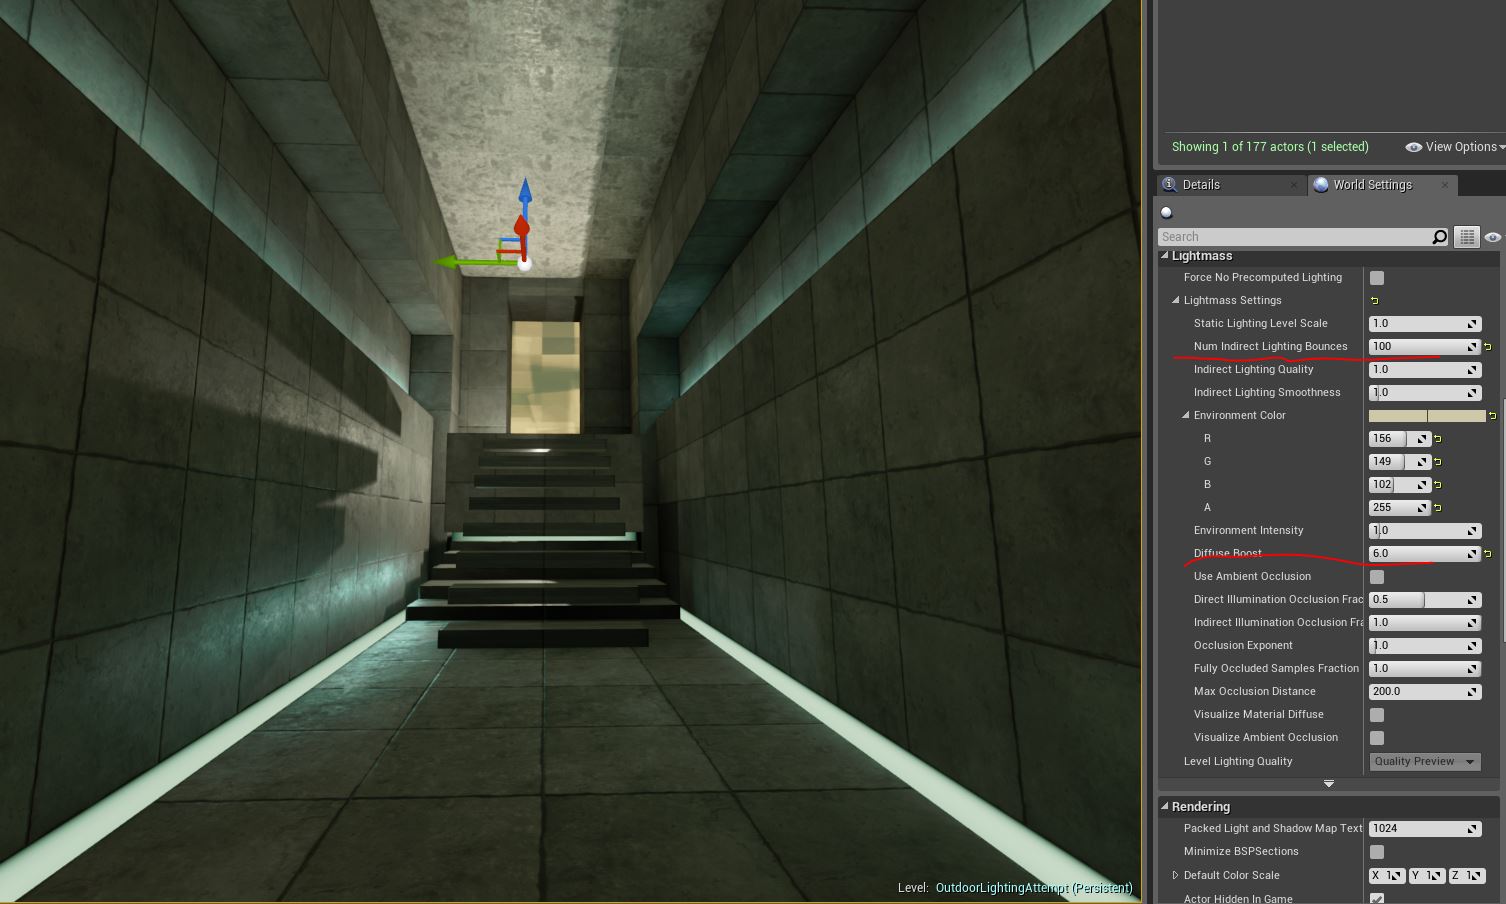
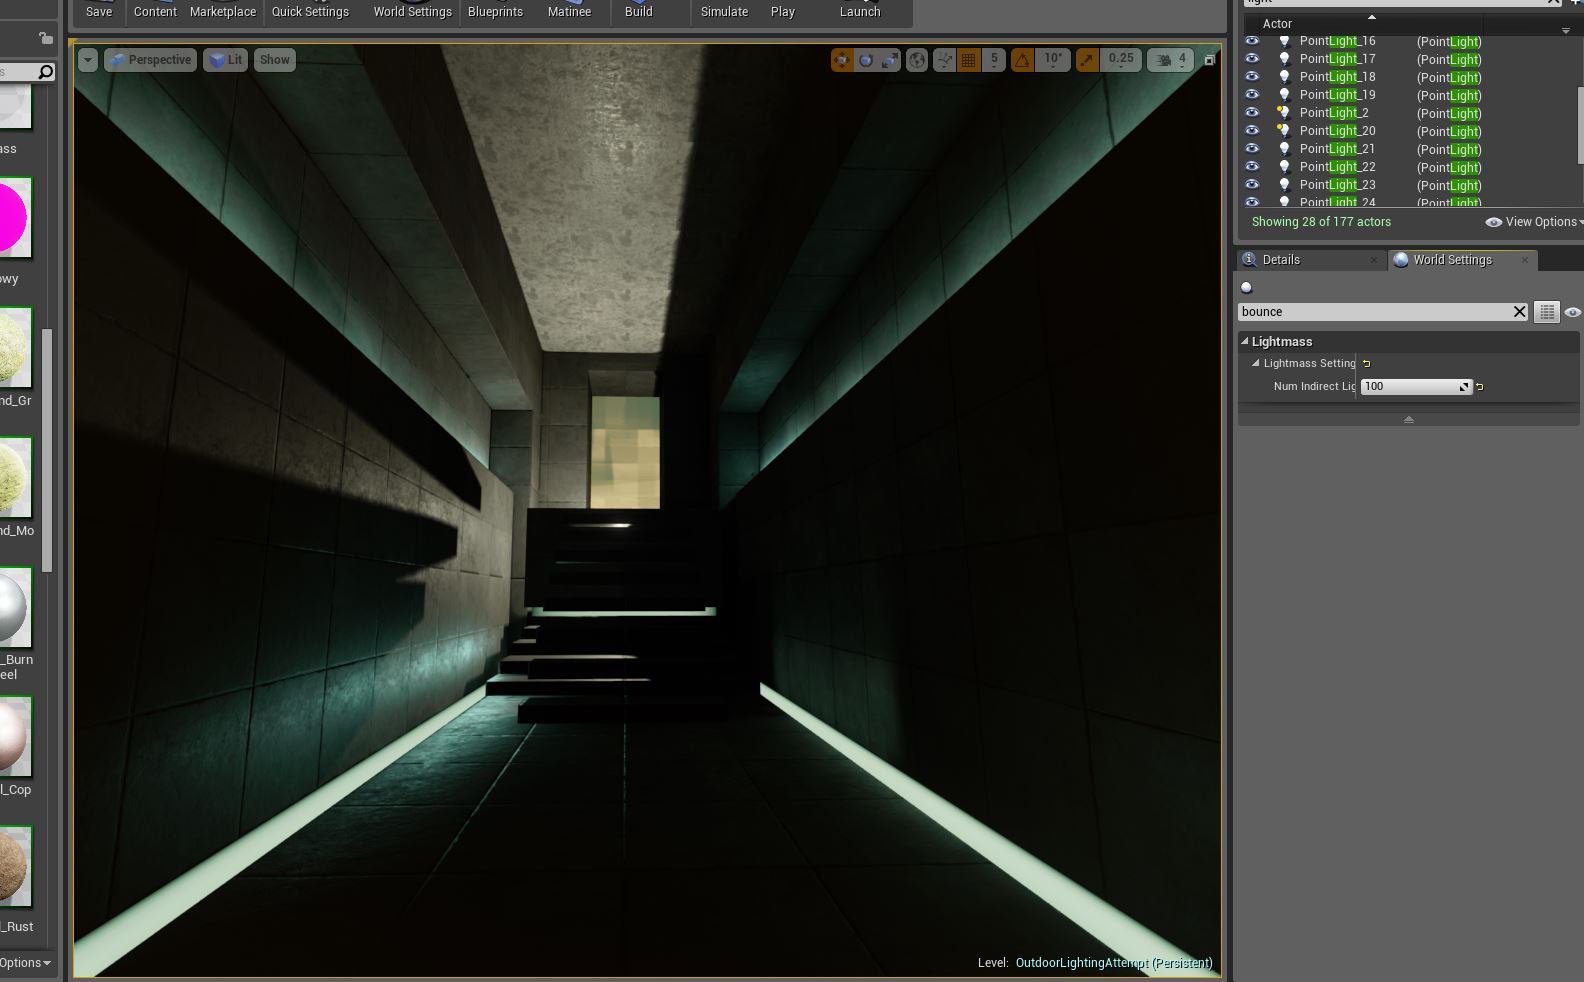
100 bounces, 6.0 diffuse boost
I scribbled “Max” on the screenshot below because the values that appear when using the editor’s arrow buttons reach its limit at that value. But you can see the previous image with bounces set to 100 has much lighter shadows.
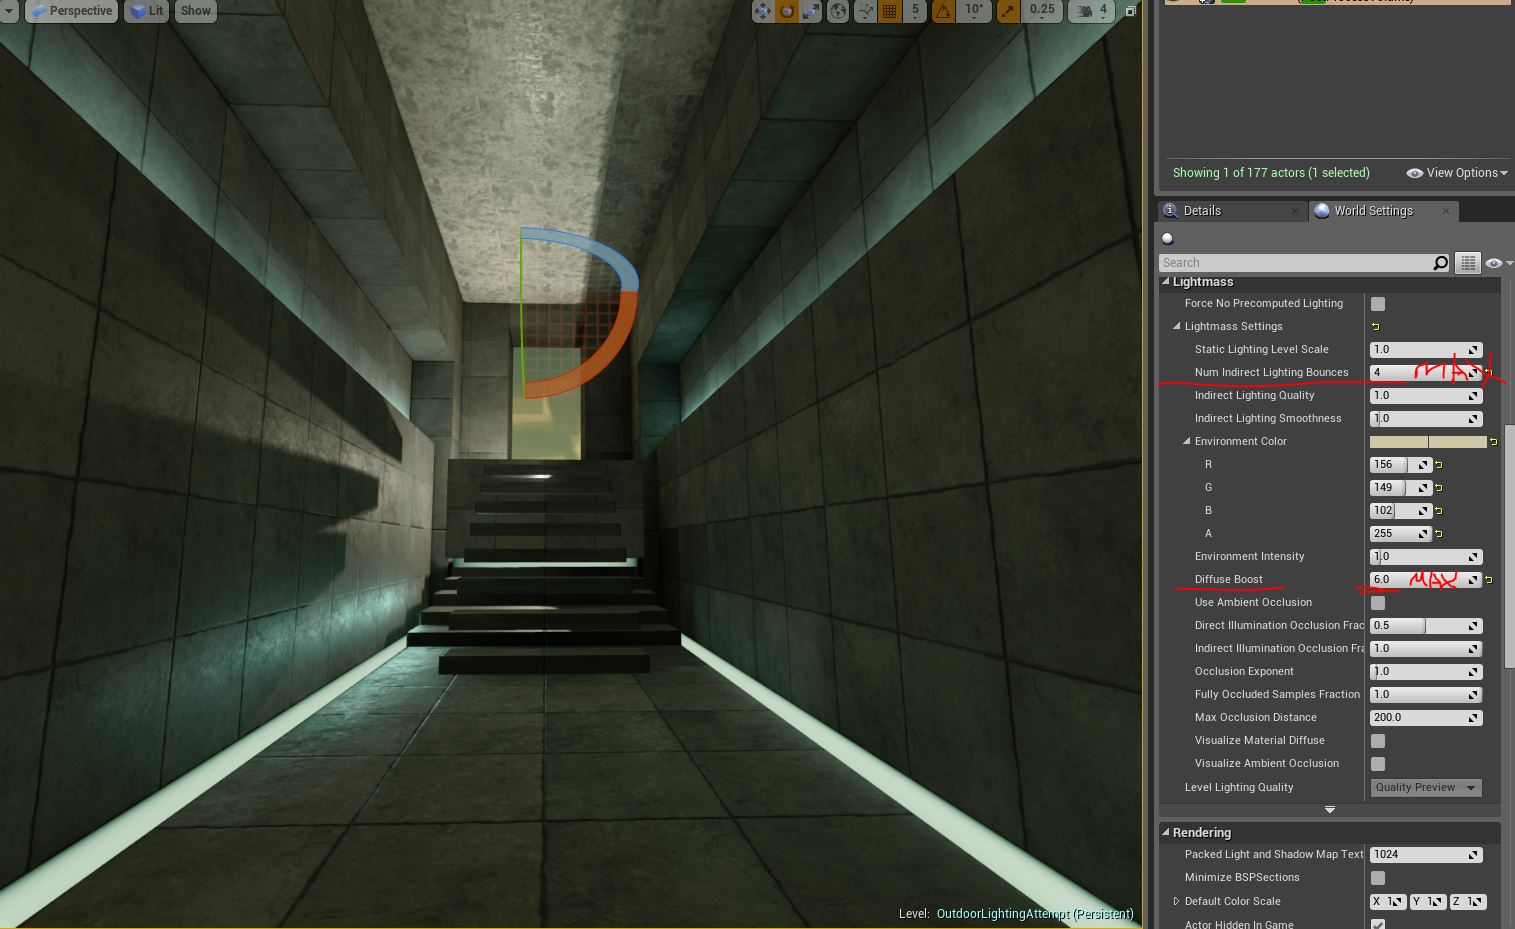
4 bounces, 6.0 diffuse boost
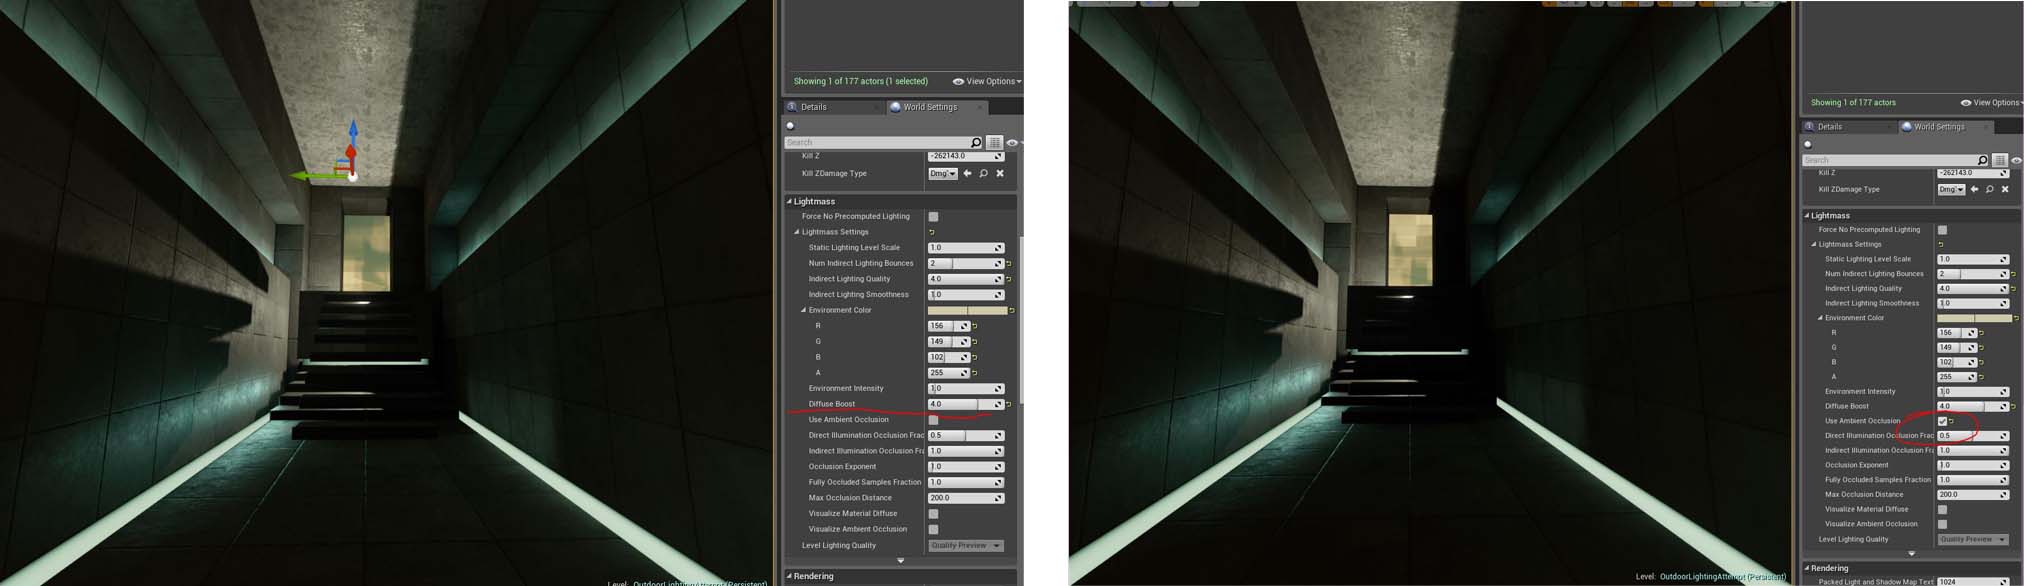
Ambient Occlusion
Altering the values of Ambient Occlusion did not have much of an effect in such a dark scene. Also there were not high enough values for Ambient occlusion to be obvious..
Lightmass calculates detailed indirect shadows automatically, but it can be useful to exaggerate indirect shadows for artistic purposes or to enhance the perception of proximity in a scene.
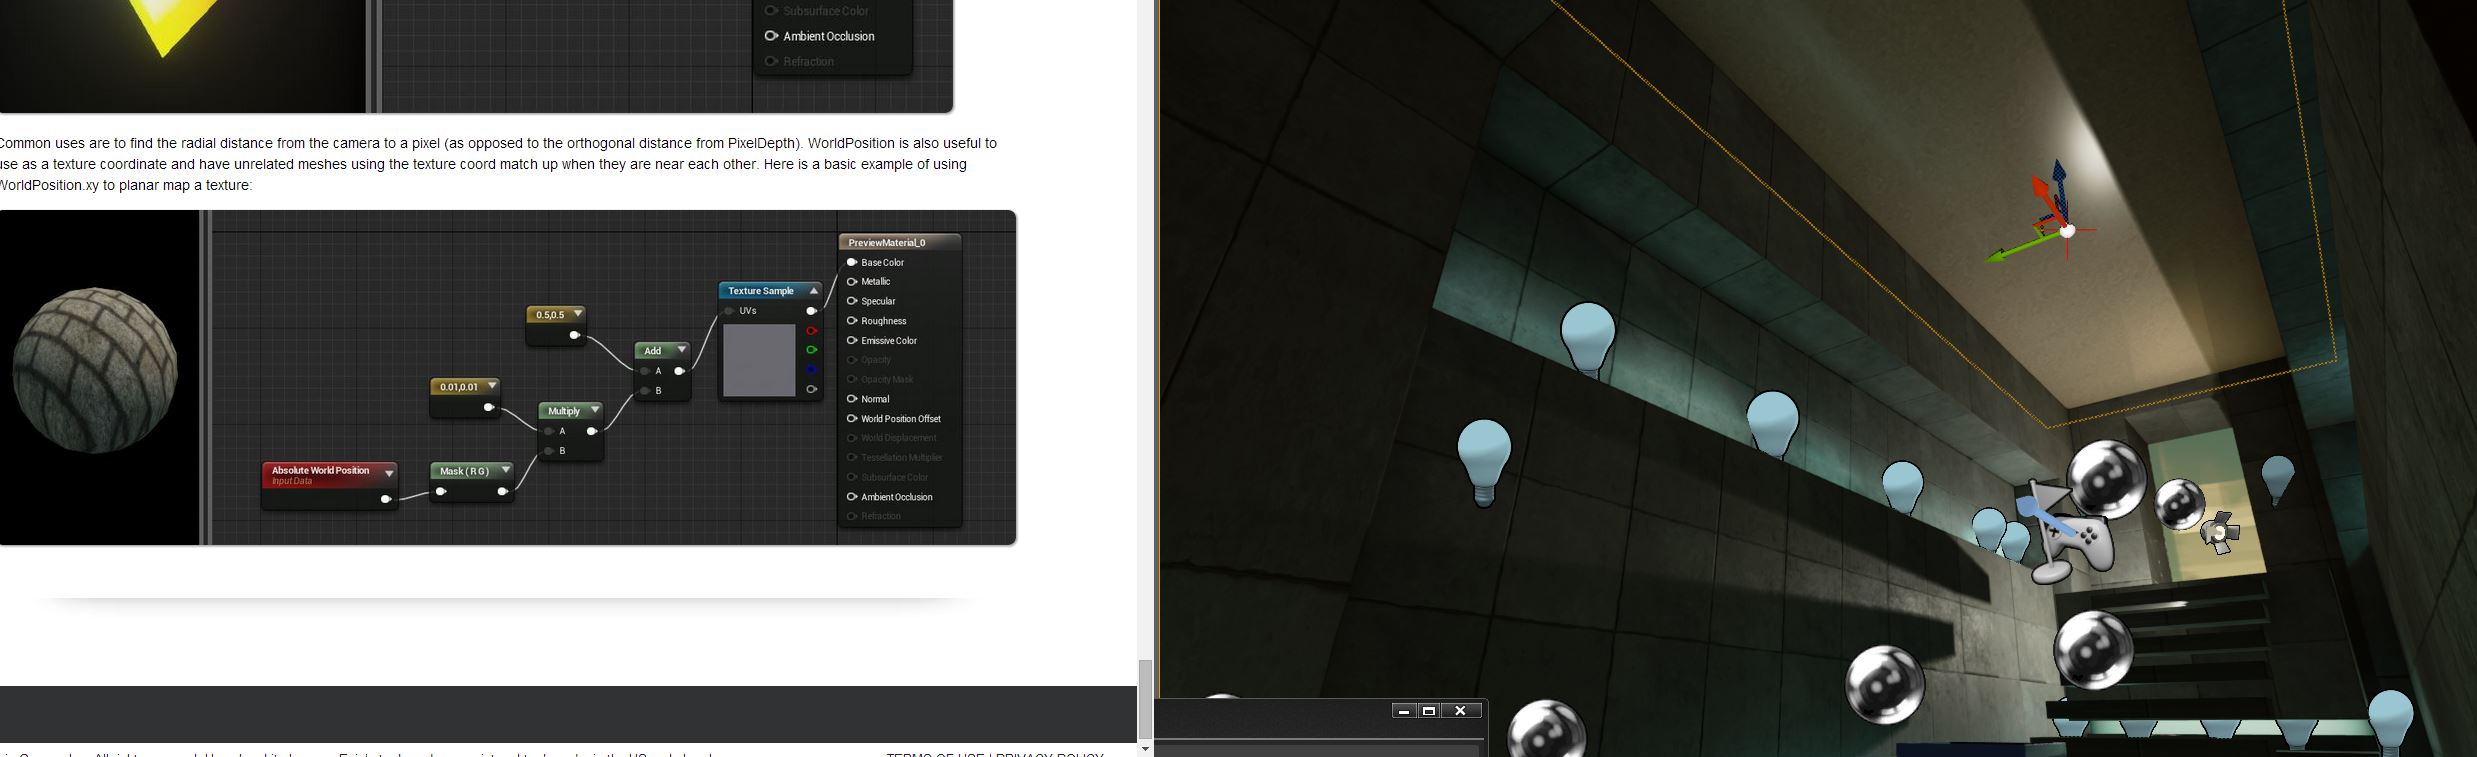
Improving Materials
The ceiling looked very repetitive and had unsightly lightmaps. I had used multiple cubes to create the ceiling. I deleted them and used a long stretched cube as one piece and used a material I created that wouldn’t stretch. I used a World Position node but alternatively it looks like [there is a function available] to do the same thing using texture object nodes.
Breathing Life into the Scene
In an attempt to make the scene more alive I decided to add some dust sprite particles to the scene. The particles added movement to the sterile scene:
I also added a God ray:
Extra Oompf
Dynamic Lighting
To get the desired specular reflection along the length of the gutter lights on both sides, I changed the right Stationary Light to be a Movable light since I reached my limit of stationary lights. The limit is 4 while they have their shadows overlapping. Since it’s such a simple and small scene I wasn’t too worried of the performance cost of having just one dynamic light.
Caustics
I also decided to throw in some caustics using Light Functions to emphasize the fact there is water sitting in that upper edge. This also added a bit more movement to the scene:
Learning From Koola
Smoothness
I tried to follow Koola’s advice that I had read on the forums:
“…max bounce world lighting settings and decreased indirect lighting smoothness to 0.8.”
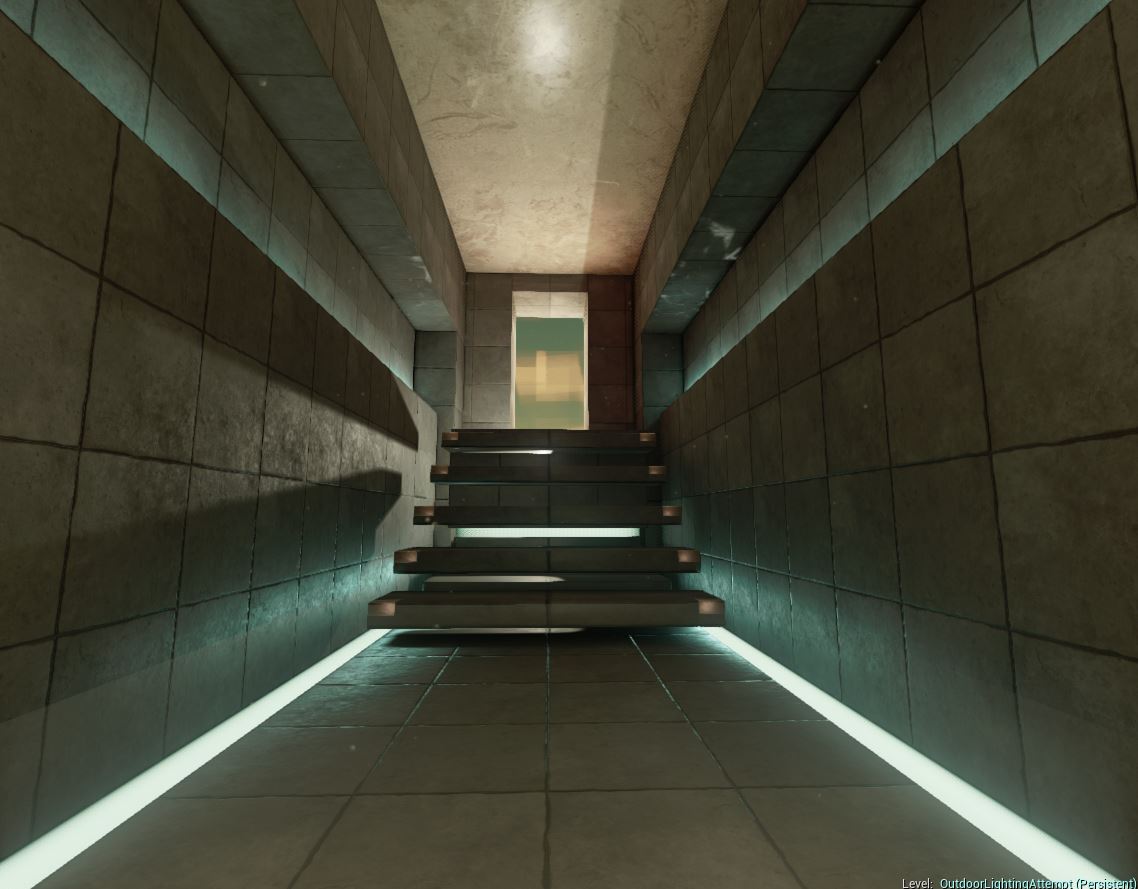
Smoothness at 0.8
Bounce Lighting
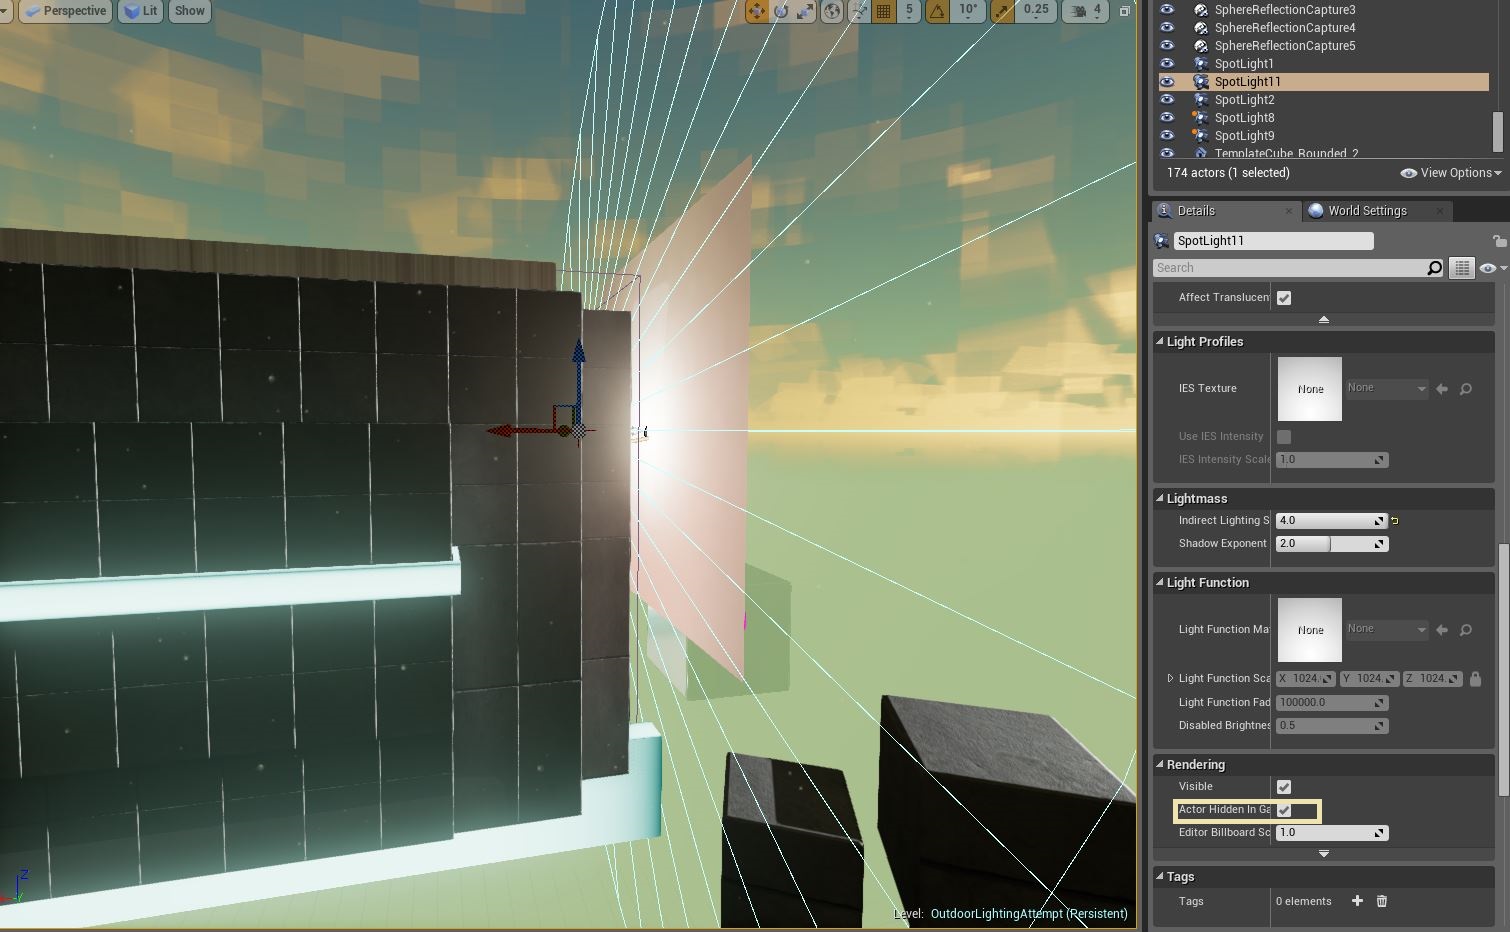
I was hesitant to use Koola’s plane technique – having a plane and a spotlight in front of it to amplify bounce lighting and color – since I didn’t want to incorporate any techniques that couldn’t be used in a playable level. But the option to hide the actor in-game and to set collision to “No Collision” frees the technique from any issues.
Altering INI Files
I felt safe messing with the BaseLightmass.ini file only because I made a separate UE4 project just for this lighting study experiment. Otherwise I wouldn’t have messed with any .ini files because of the risk of compromising or corrupting our game’s project files.
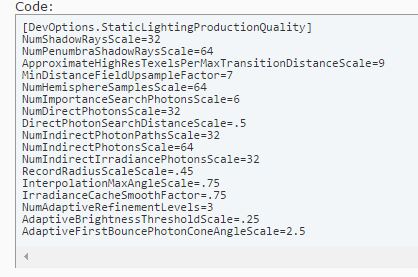
These are the settings that Koola set in his UE4 Project’s BaseLightmass.ini file
Learning More
Soon after I originally completed my study on Koola’s lighting techniques and style he had released a downloadable example room to the UE4 marketplace. This confirmed a lot of what I had discovered during my study. Check it out!
I learned quite a bit by messing with multiple settings in various option and property menus. I think one of the bigger things I took from this research was that shaders can very easily determine the quality of the scene in your game. Spend a good amount of effort in making a seamless, tilable, reusable shader that will impress and you will have a much better looking scene. I still have a long way to go but I feel like I leveled up my skills a bit. I hope my research notes inspire you to write about your game development learning experiences.
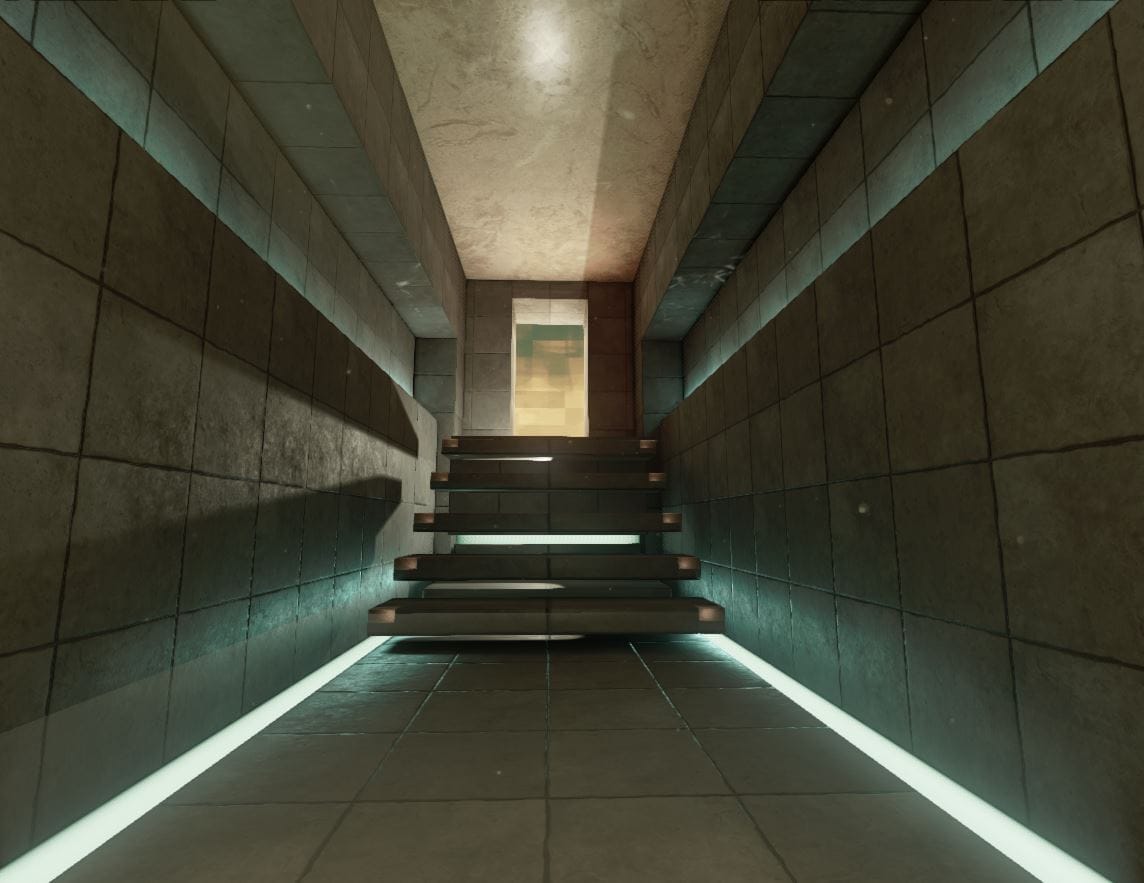
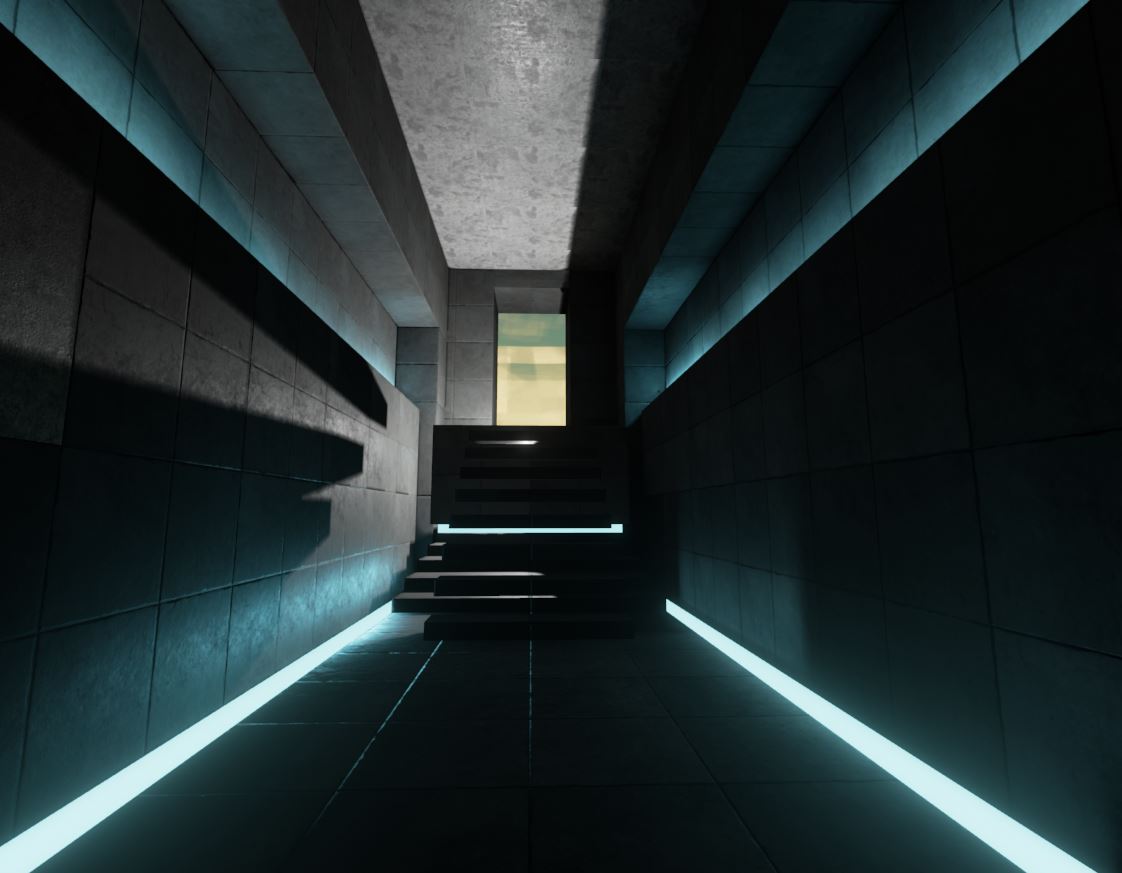
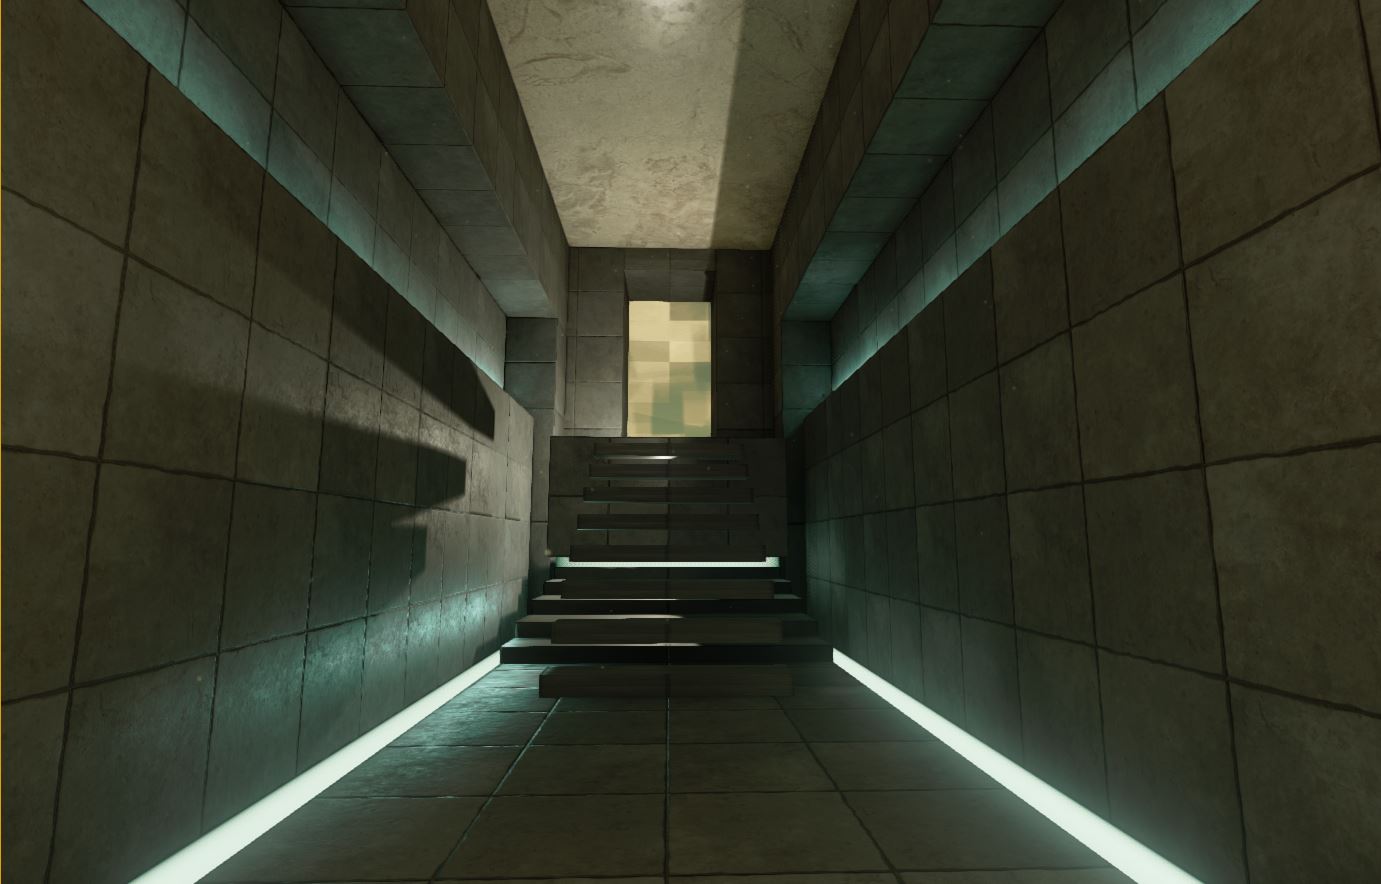
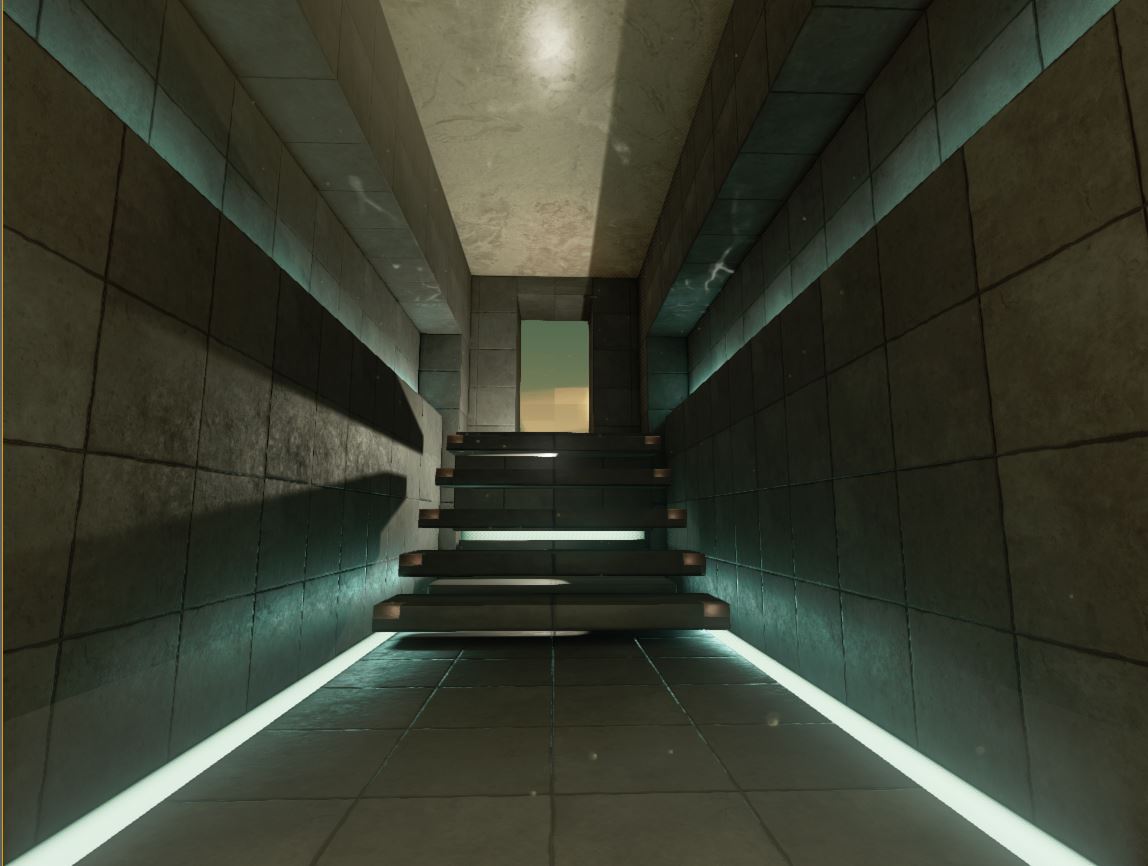
Before and after